WhatsApp + ChatWoot - Installation Guide
July 7, 2025 in ChatWoot, Apps by devlikeapro5 minutes

Overview
Complete guide to install and set up production-ready WAHA and Chatwoot instances on your own infrastructure!
ChatWoot Articles
Series of articles about WhatsApp and ChatWoot integration using 🧩 ChatWoot App:
You can follow them one by one or skip some parts if you don’t need them.
After completing the installation guide, you’ll have:
- WAHA on http://localhost:3000
- ChatWoot on http://localhost:3009
Disclaimer
This project is not affiliated, associated, authorized, endorsed by, or in any way officially connected with WhatsApp, ChatWoot, or any of their respective subsidiaries or affiliates. The official websites can be found at https://whatsapp.com and https://chatwoot.com.
For businesses seeking to integrate with WhatsApp for critical applications, we strongly recommend using officially supported methods.
Requirements
- Hardware: VM, VPS, or laptop with minimum 2 CPU and 4GB RAM
- Operating System: Debian or Ubuntu based distributions.
Using a VPS or VM via SSH?
You need to forward ports so you can access remote server ports from your laptop.
Connect to the server using the command:
ssh -L 3000:localhost:3000 -L 3009:localhost:3009 {user}@{server}Steps to Deploy
Step 0: Add DNS Aliases
First, we need to add DNS Aliases so everything works as inside docker containers.
👉 Run the below commands on YOUR LAPTOP/PC, NOT on the VPS or VM:
Step 1: Install Docker
# example in ubuntu
apt-get update
apt-get upgrade
curl -fsSL https://get.docker.com -o get-docker.sh
sudo sh get-docker.sh
apt install docker-compose-plugin
Step 2: Download the Required Files
# Download the env files
wget -O .waha.env https://raw.githubusercontent.com/devlikeapro/waha/refs/heads/core/docker-compose/chatwoot/.waha.env
wget -O .chatwoot.env https://raw.githubusercontent.com/devlikeapro/waha/refs/heads/core/docker-compose/chatwoot/.chatwoot.env
# Download docker-compose
wget -O docker-compose.yaml https://raw.githubusercontent.com/devlikeapro/waha/refs/heads/core/docker-compose/chatwoot/docker-compose.yaml
Step 3: Init WAHA
Generate a .waha.env file that we’ll use in the next step for credentials:
docker compose run --no-deps -v "$(pwd)":/app/env waha init-waha /app/env .waha.env .waha.env --forceCredentials generated.
Dashboard and Swagger:
- Username: admin
- Password: 11111111111111111111111111111111
API key:
- 00000000000000000000000000000000
Use it in the Dashboard connection flow: https://waha.devlike.pro/docs/how-to/dashboard/#api-keyRemember these values (you can always check the .env file if you forget them):
- Username / Password:
admin / 11...11- use them to access the Dashboard and Swagger UI - Api Key:
00...00- use it to connect to your server
👉 You can change variables to any values, but use long random strings (like UUIDv4)
Step 4: Configure Environment Variables
Now you can tweak .waha.env, .chatwoot.env and docker-compose.yaml according to your preferences.
Do Not Use Weak API Keys or Passwords!
Even if you’re running WAHA on a private server and think the IP is unknown - it’s straightforward for attackers to find and exploit it to send spam or abuse your WhatsApp sessions.
Always set strong, random values (see a guide below) for:
WAHA_API_KEYWAHA_DASHBOARD_PASSWORDWHATSAPP_SWAGGER_PASSWORD- you can the same as forWAHA_DASHBOARD_PASSWORD
uuidgen | tr -d '-'
> 2e1005a40ef74edda01ffb1ade877fd3
Step 5: Pull Docker Images
Step 6: Prepare ChatWoot Database
docker compose run --rm chatwoot bundle exec rails db:chatwoot_prepareStep 7: Start the Services
docker compose up -dStep 8: Access Your WAHA
Open http://localhost:3000/dashboard with credentials:
- User:
admin - Password:
11111111111111111111111111111111
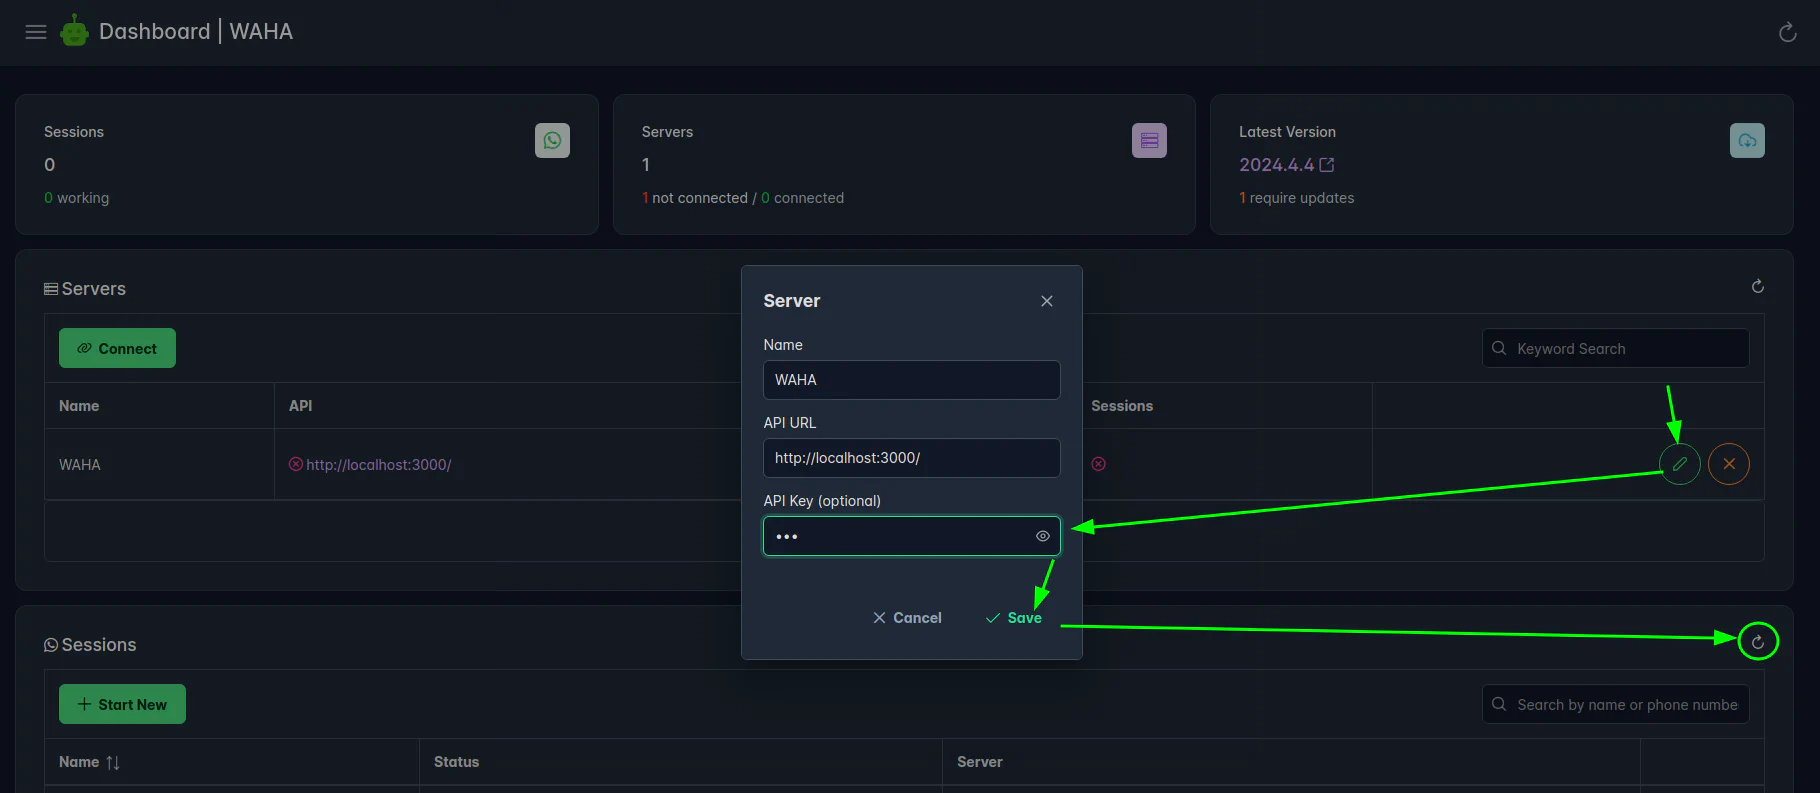
Add Api Key to your worker:
- Api-Key:
00000000000000000000000000000000
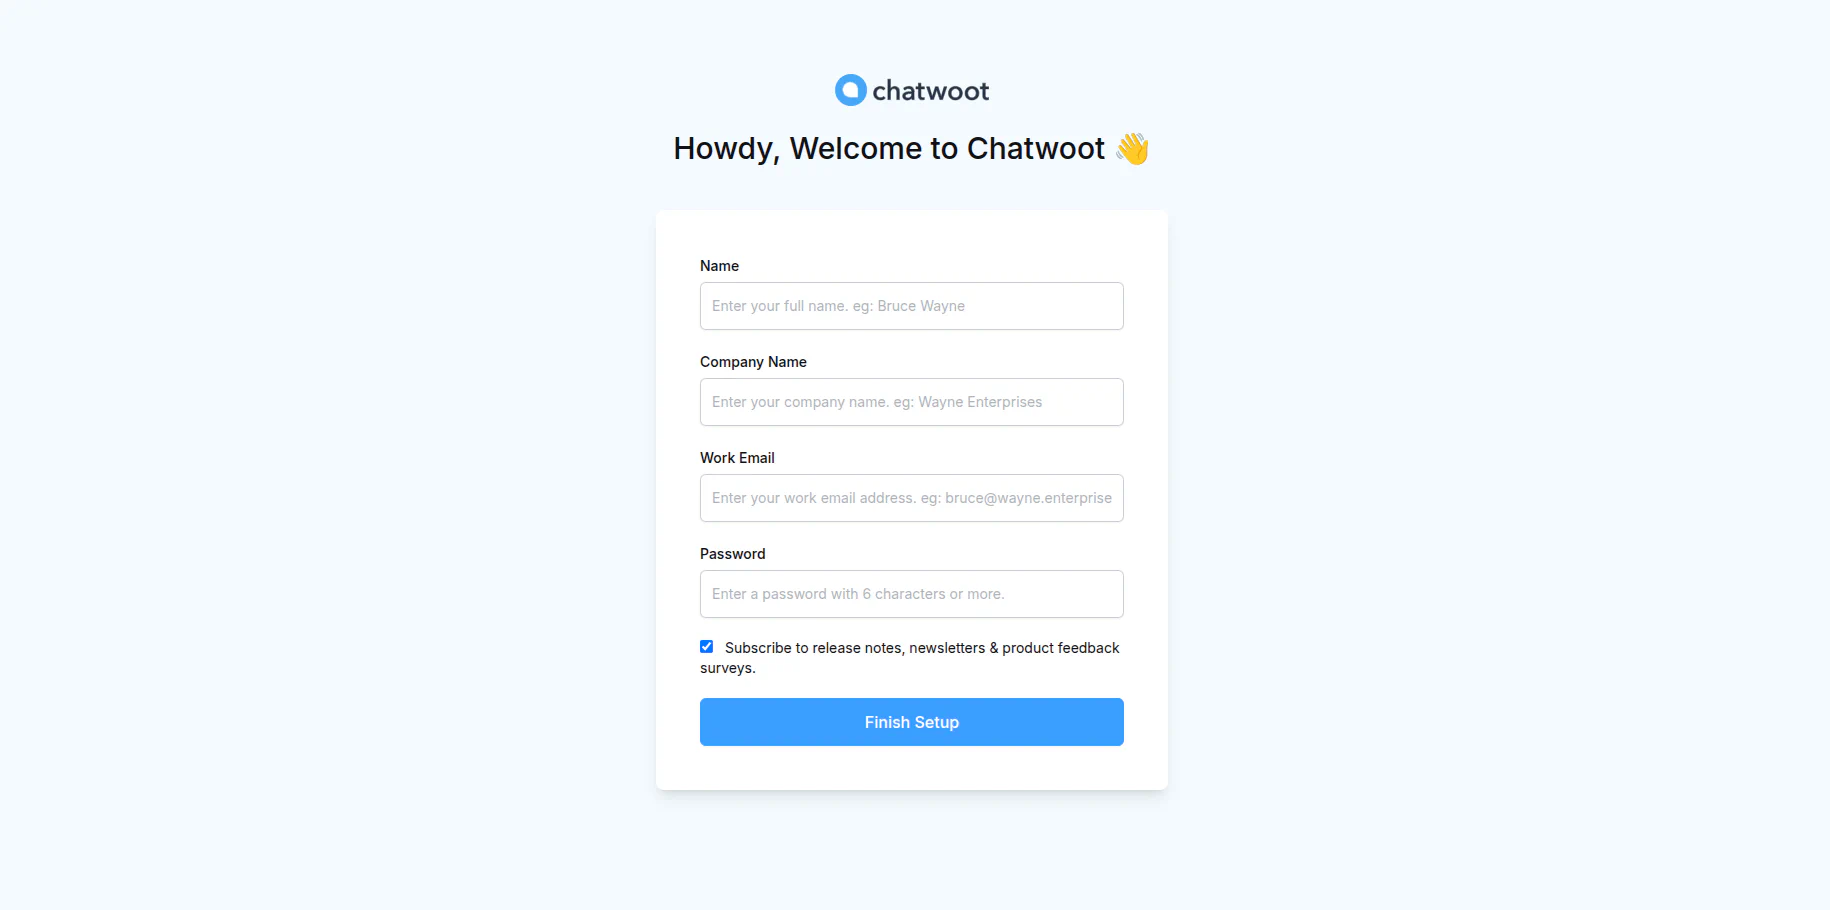
Step 9: Access Your ChatWoot
Open and finish the onboarding guide on http://localhost:3009/
What is next?
👉 Connect WhatsApp to ChatWoot in WhatsApp + ChatWoot - Configuration Guide
ChatWoot Articles
Series of articles about WhatsApp and ChatWoot integration using 🧩 ChatWoot App:
You can follow them one by one or skip some parts if you don’t need them.