WAHA + n8n: No Code Low Code WhatsApp Automation Step-By-Step Guide
August 27, 2024 in Tips by devlikeapro3 minutes

Here’s how you can start developing your WhatsApp automation with using n8n and WAHA in pair so you can create your own no-code or low-code WhatsApp automation:

Installation
Here’s a quick docker-compose we have prepared for you to start using n8n with WAHA:
wget https://raw.githubusercontent.com/devlikeapro/waha/core/docker-compose/n8n/docker-compose.yaml- If you’re using WAHA Plus (donation version) - kindly go to https://portal.devlike.pro and docker pull the image with your credentials:
docker login -u devlikeapro -p <dckr_pat_1111111111>
docker pull devlikeapro/waha-plus
docker logout- If you’re using WAHA Core (free version) - you can use the image from Docker Hub:
sed -i 's/devlikeapro\/waha-plus/devlikeapro\/waha/g' docker-compose.yamlNow you’re ready to run:
docker compose up
# to run in background:
# docker compose up -d
After that, open:
- n8n at https://localhost:5678 and set up your email/password
- WAHA at https://localhost:3000/dashboard (
admin/admin)
Install WAHA n8n node
We provide WAHA Node, which you can install at your n8n installation.
Go to your n8n => Settings => Community nodes and install:
@devlikeapro/n8n-nodes-wahaIf you need help with that, check the Install community nodes
First WhatsApp workflow
We’ll build simple workflow - when your WhatsApp account got any message, it responds with “Hi there” message
Step 1: Add WAHA API credentials
Before starting using the node, you need to add WAHA API credentials.
- Go to your n8n => Home => Credentials => Add first credential
- Find WAHA API in dropdown
- Host URL -
http://waha:3000or use your domain - API Key -
adminor your API key set indocker-compose.yaml - Click Save - it’ll check the connection and save the credentials
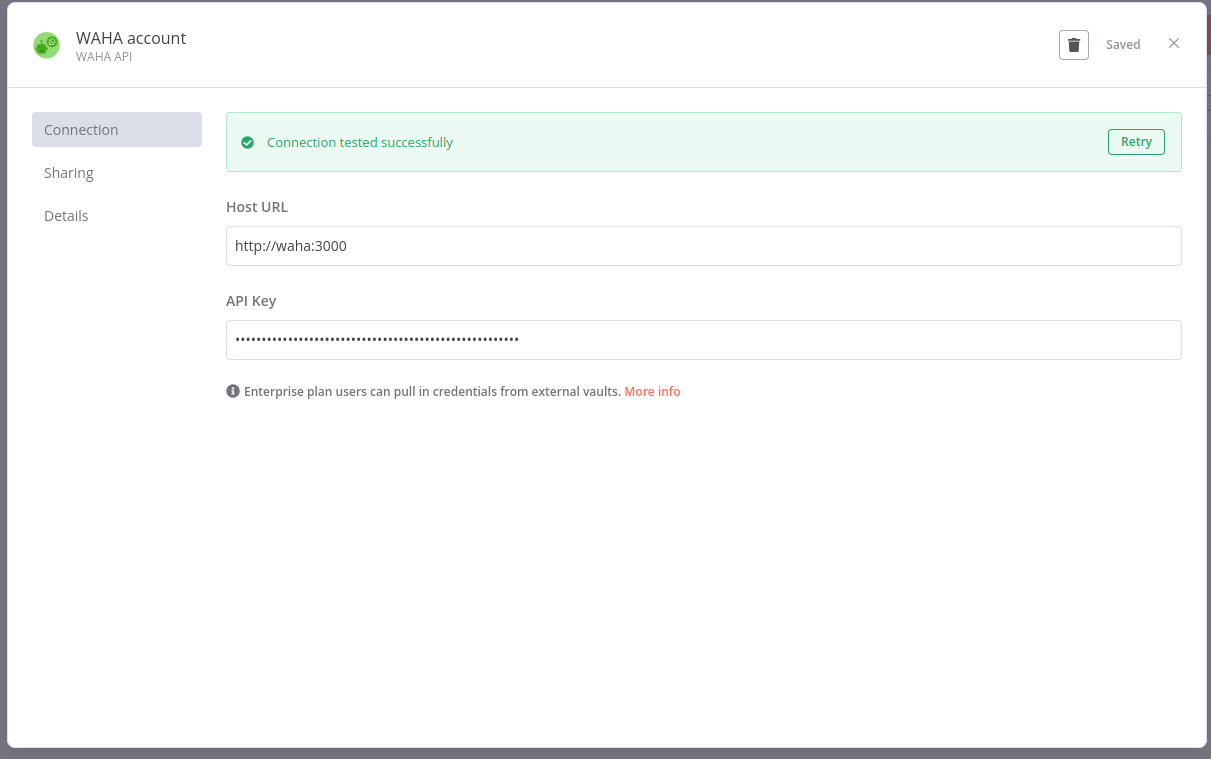
If you need help with that, check the Create credentials
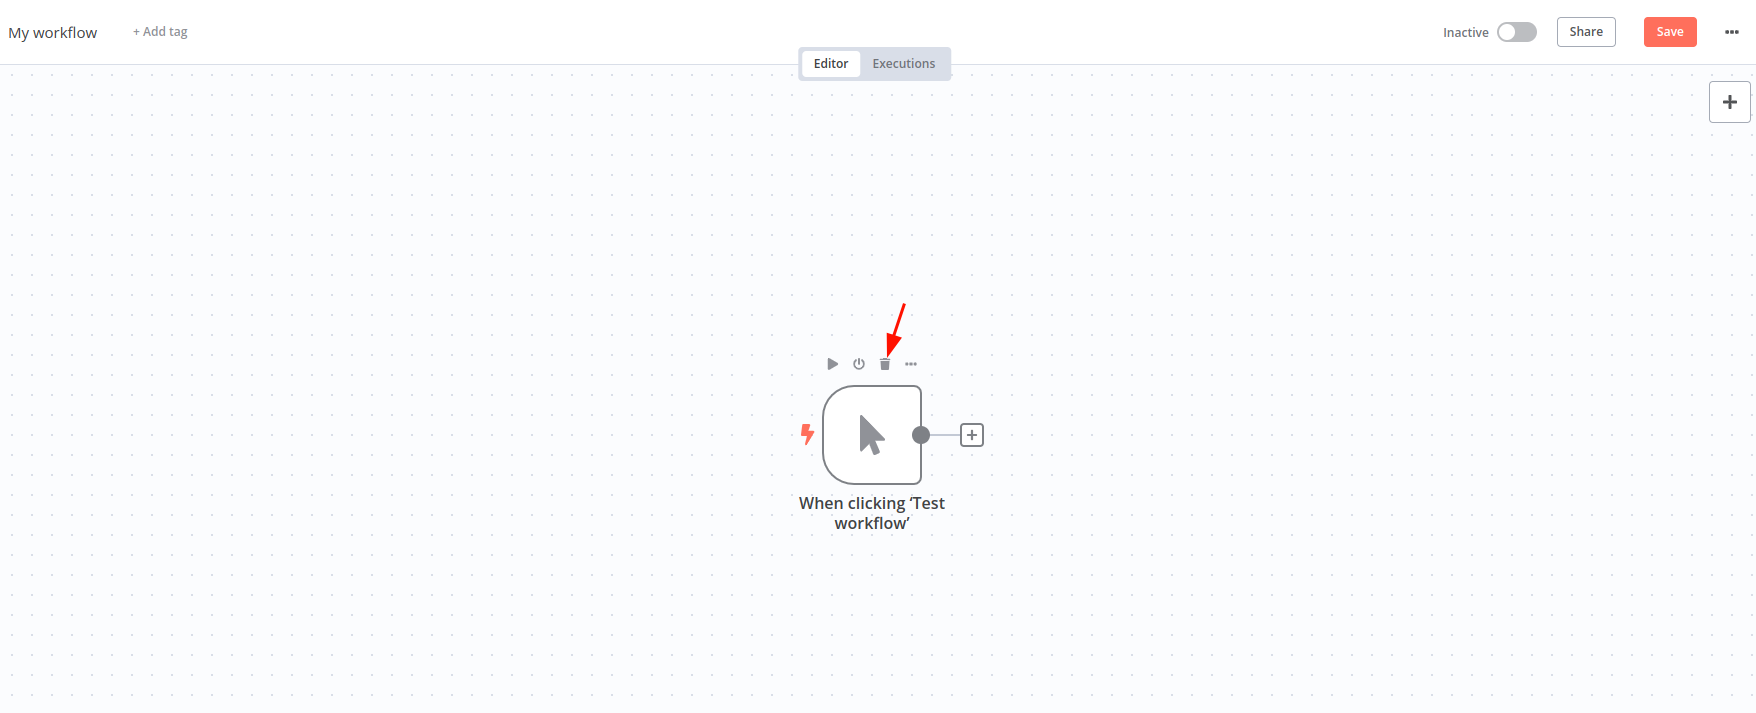
Step 2: Create a new workflow
- Go to n8n => Home => Workflows => Create new workflow.
- Remove Manual trigger
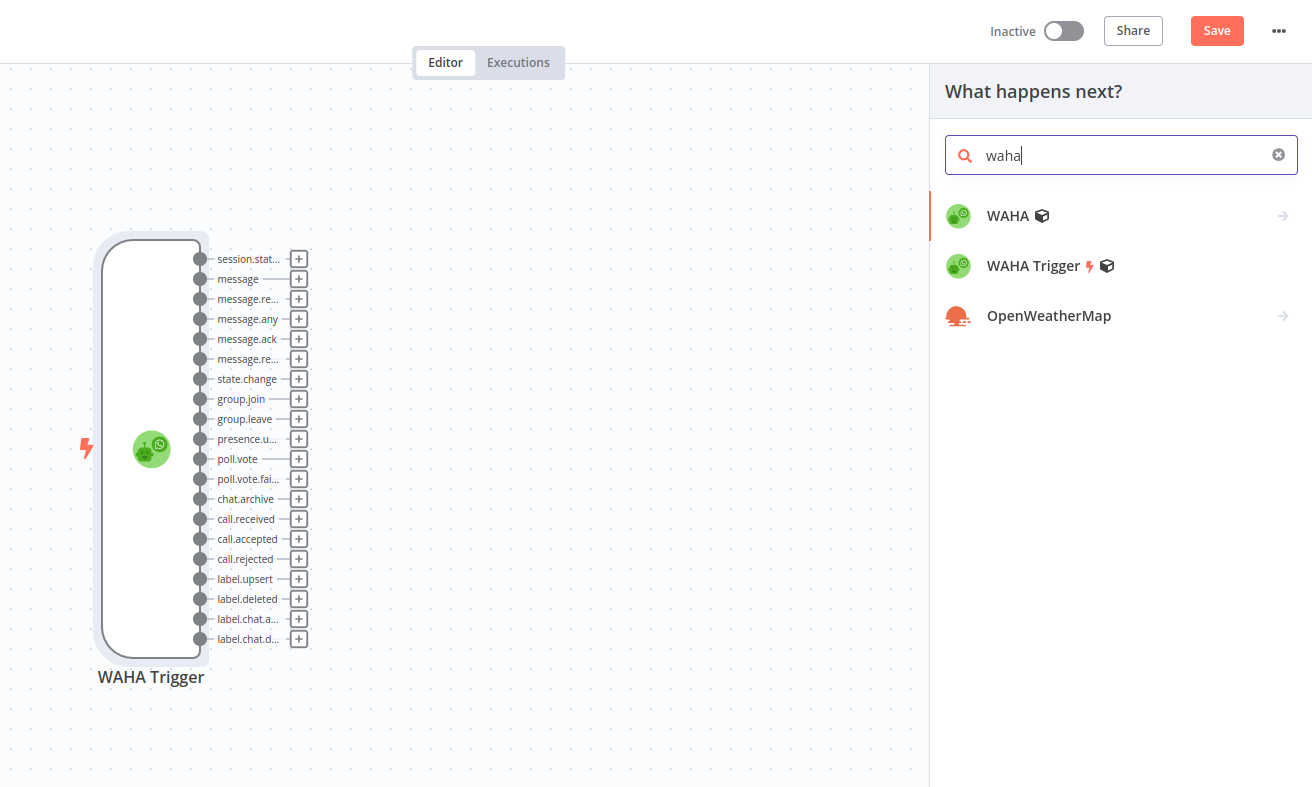
Step 3: Add WAHA Trigger
Add WAHA Trigger node.
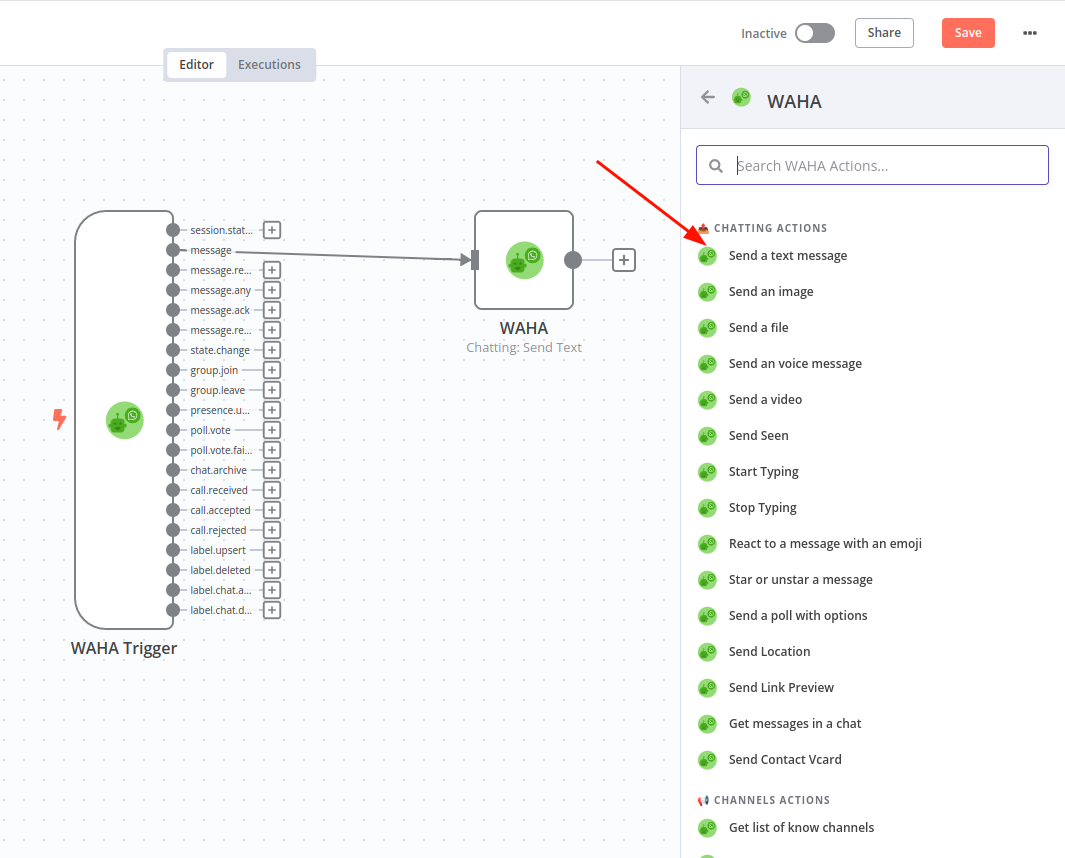
Step 4: Add Send a text message action
Add Send a text message WAHA Action and connect it to message WAHA Trigger output:
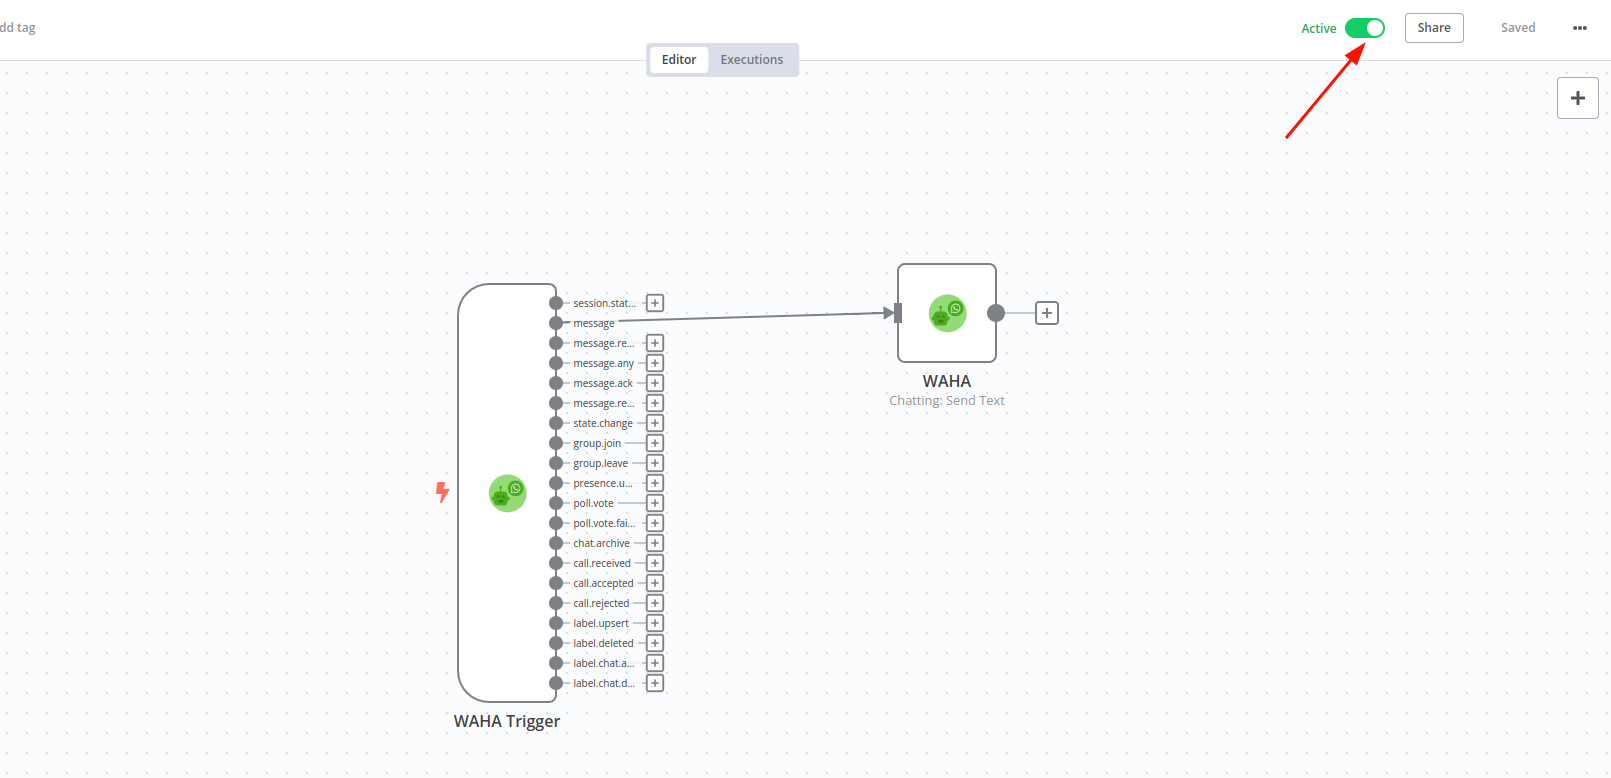
Step 5: Activate the workflow
Click Save and Activate the workflow:
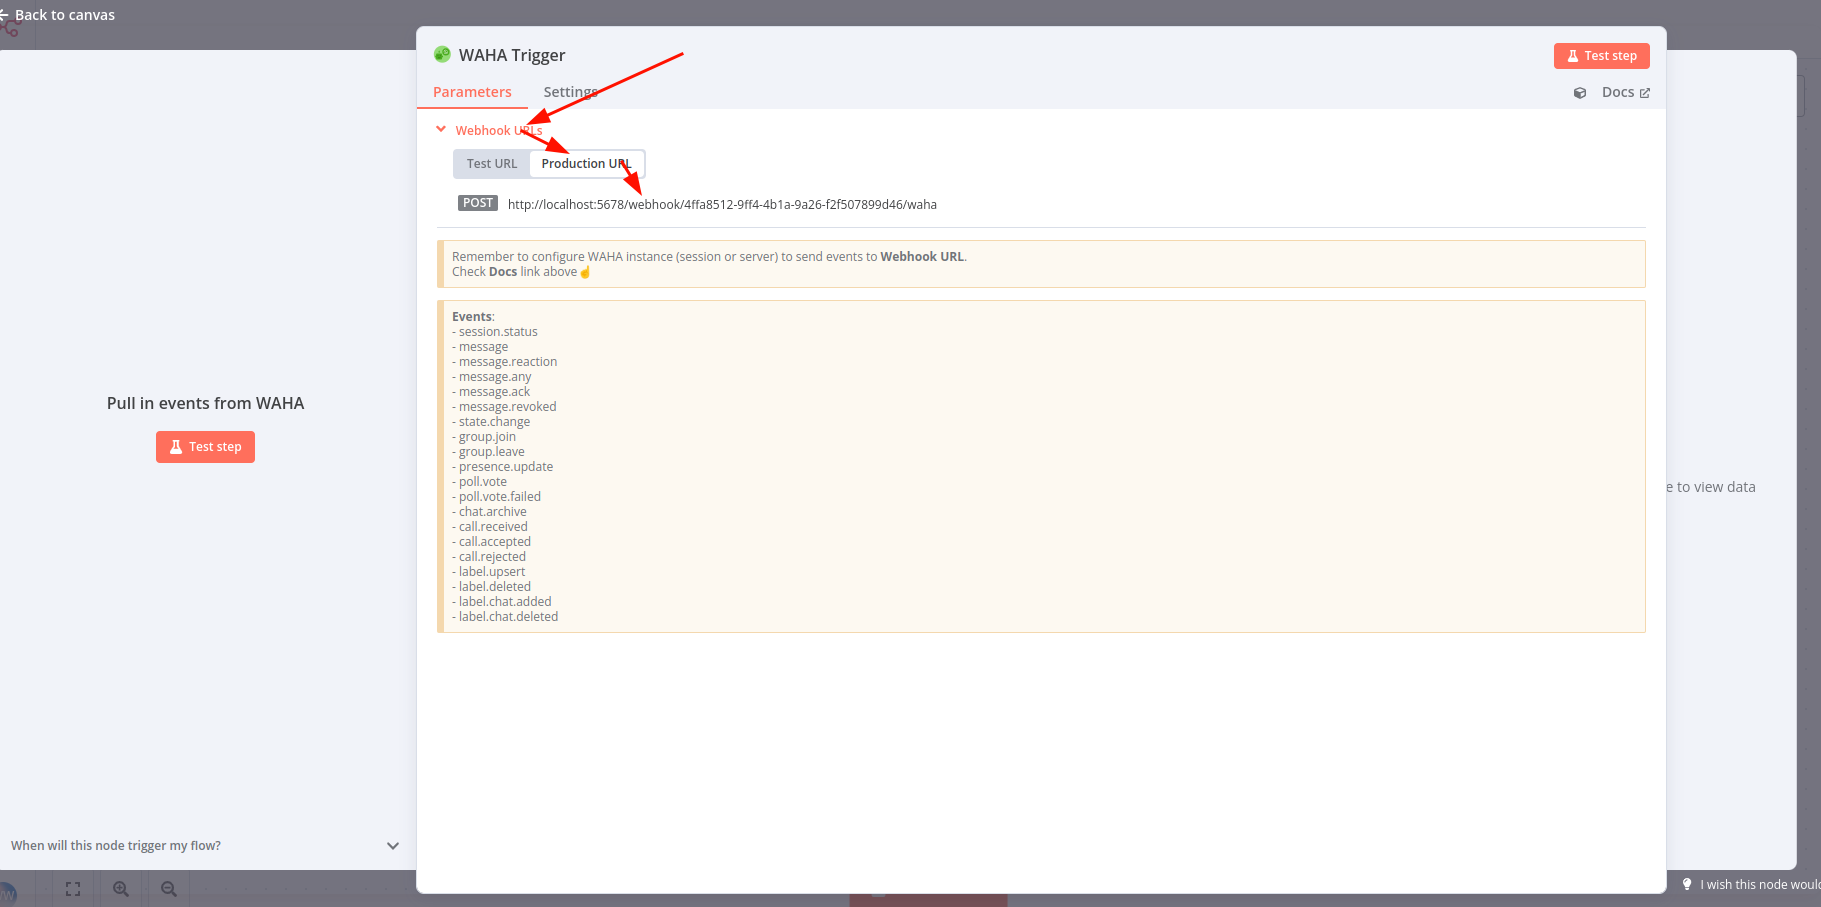
Step 6: Start a new session
Open the WAHA Trigger and expand Webhook URLs => Production URL
Go to http://localhost:3000/dashboard/ (admin/admin) and
Start New session with the URL you got from the WAHA Trigger:
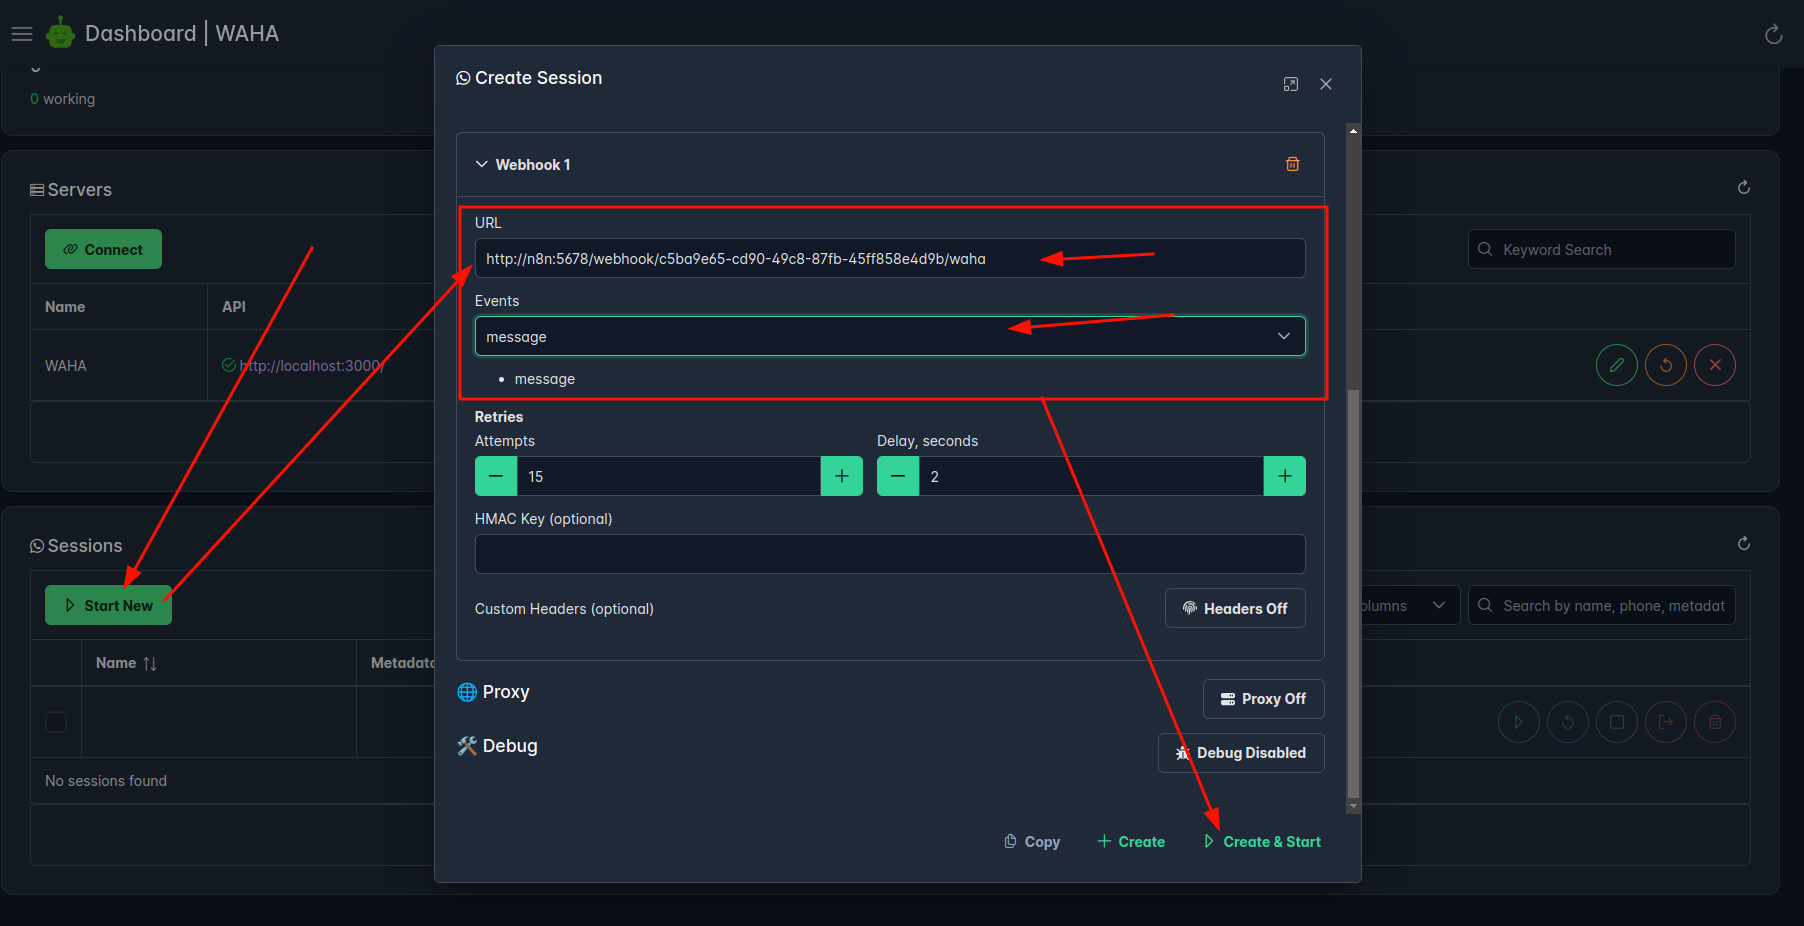
Scan QR and wait till session in WORKING state:

Step 7: Send a message
Now you can send any message to your WhatsApp account, and it’ll respond with “Hi there” message!
Workflow Templates
👉 Check out https://waha-n8n-workflows.devlike.pro for workflow templates!
Troubleshooting
If you’re experiencing any issues or have a feature request, please check the below resources: WAHA:
n8n:
If that doesn’t help - kindly open an issue in the devlikeapro/n8n-nodes-waha GitHub repository, we’re happy to help you out!