Deploy WAHA on Coolify
January 13, 2026 in Install by devlikeapro3 minutes

Overview
With WAHA on Coolify, you get:
- Free Self-hosted Coolify
- UI for deployments, env vars, and storage
- Automatic HTTPS with a built-in proxy
Requirements
- Clean Ubuntu or any Linux-based OS
- Minimum 2 CPU and 2 GB RAM
- Public IP address assigned to the server
- (Recommended) DNS address assigned to the server for HTTPS -
waha.example.com
Install
Install Coolify
For self-hosted Coolify, run:
curl -fsSL https://cdn.coollabs.io/coolify/install.sh | sudo bashFinish the web setup in your browser.
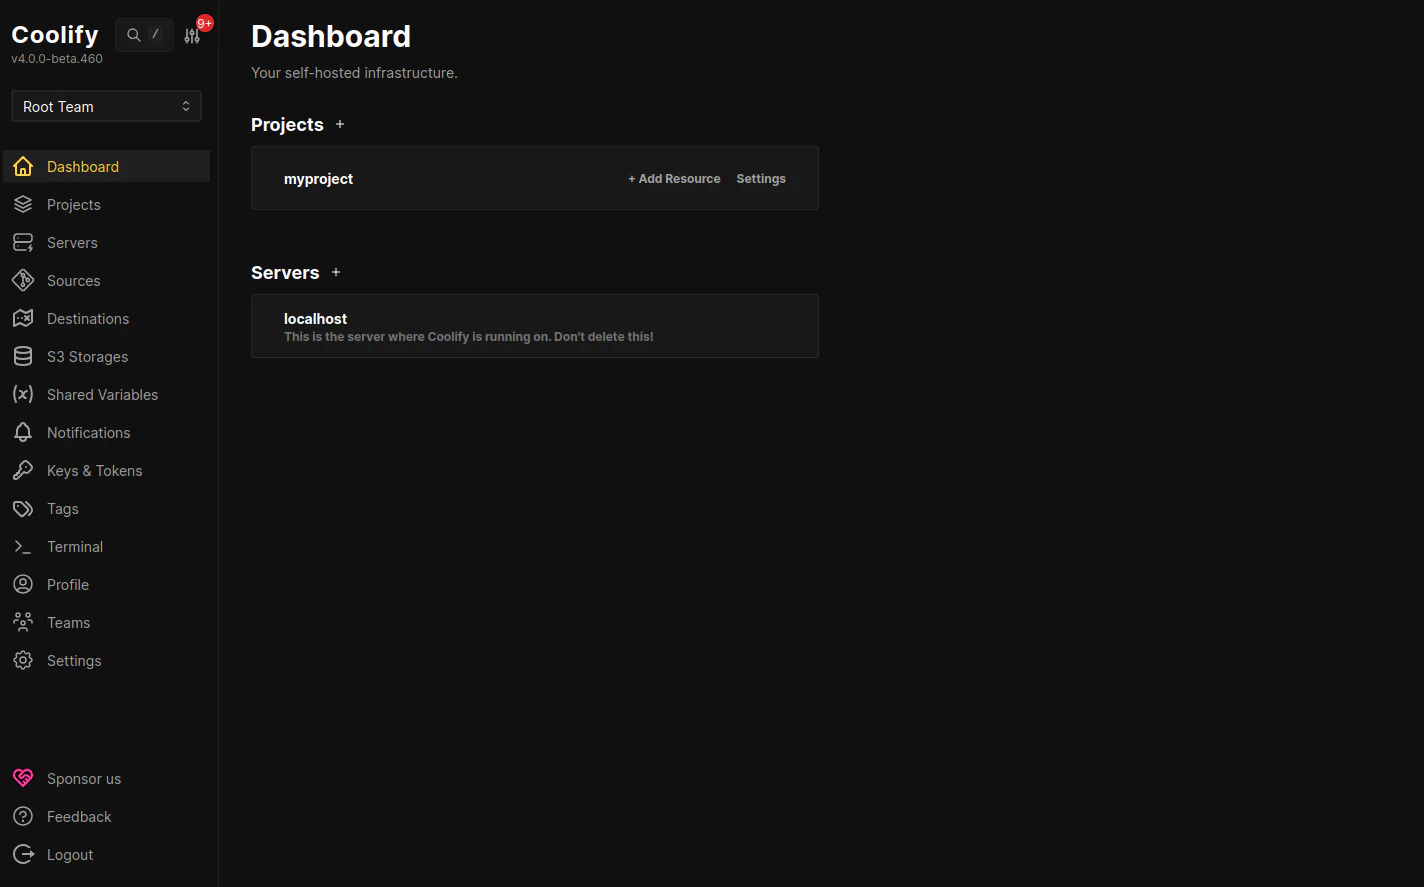
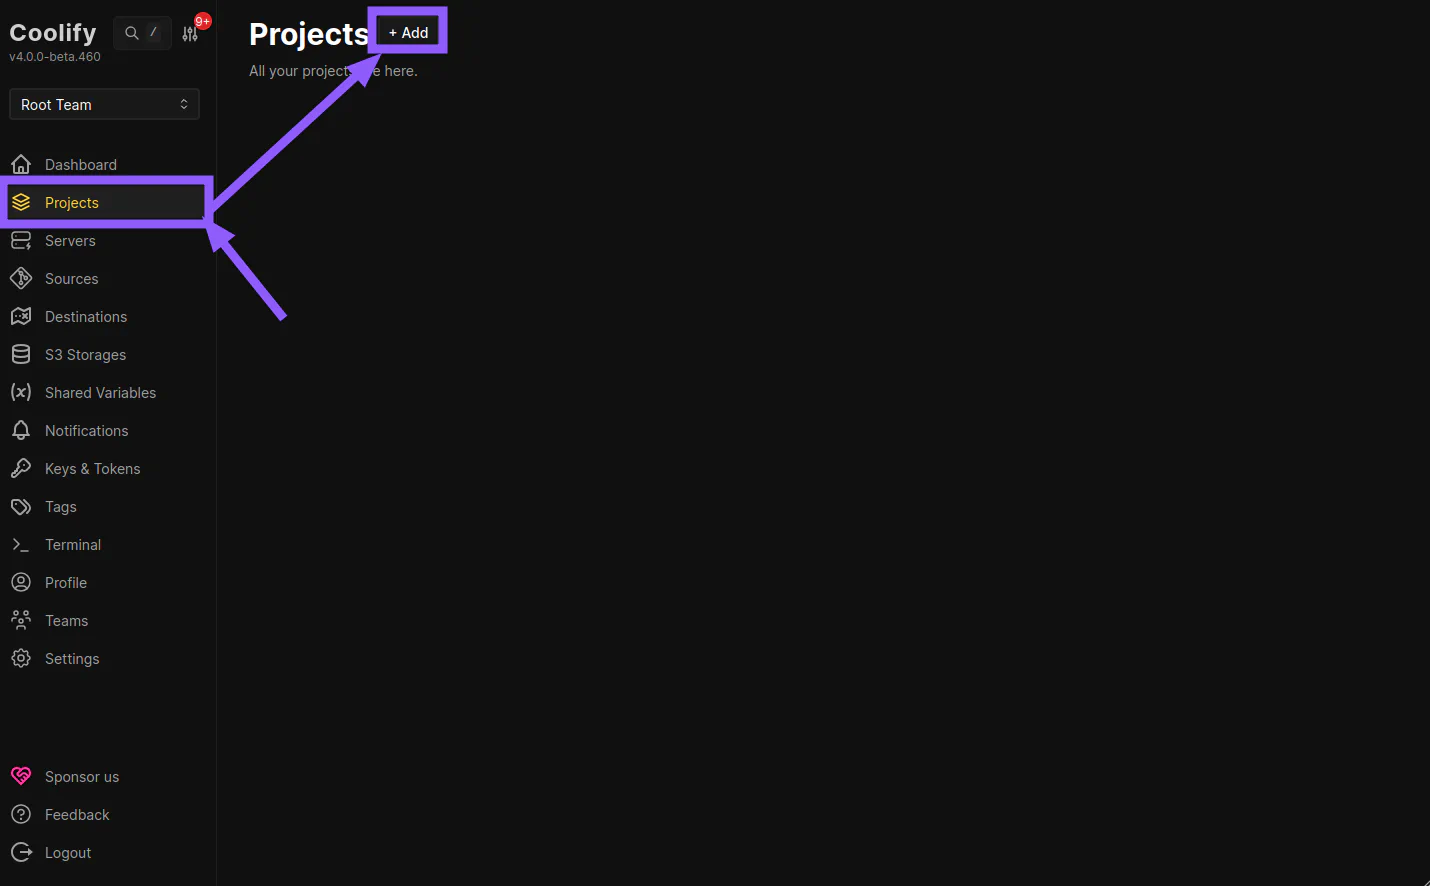
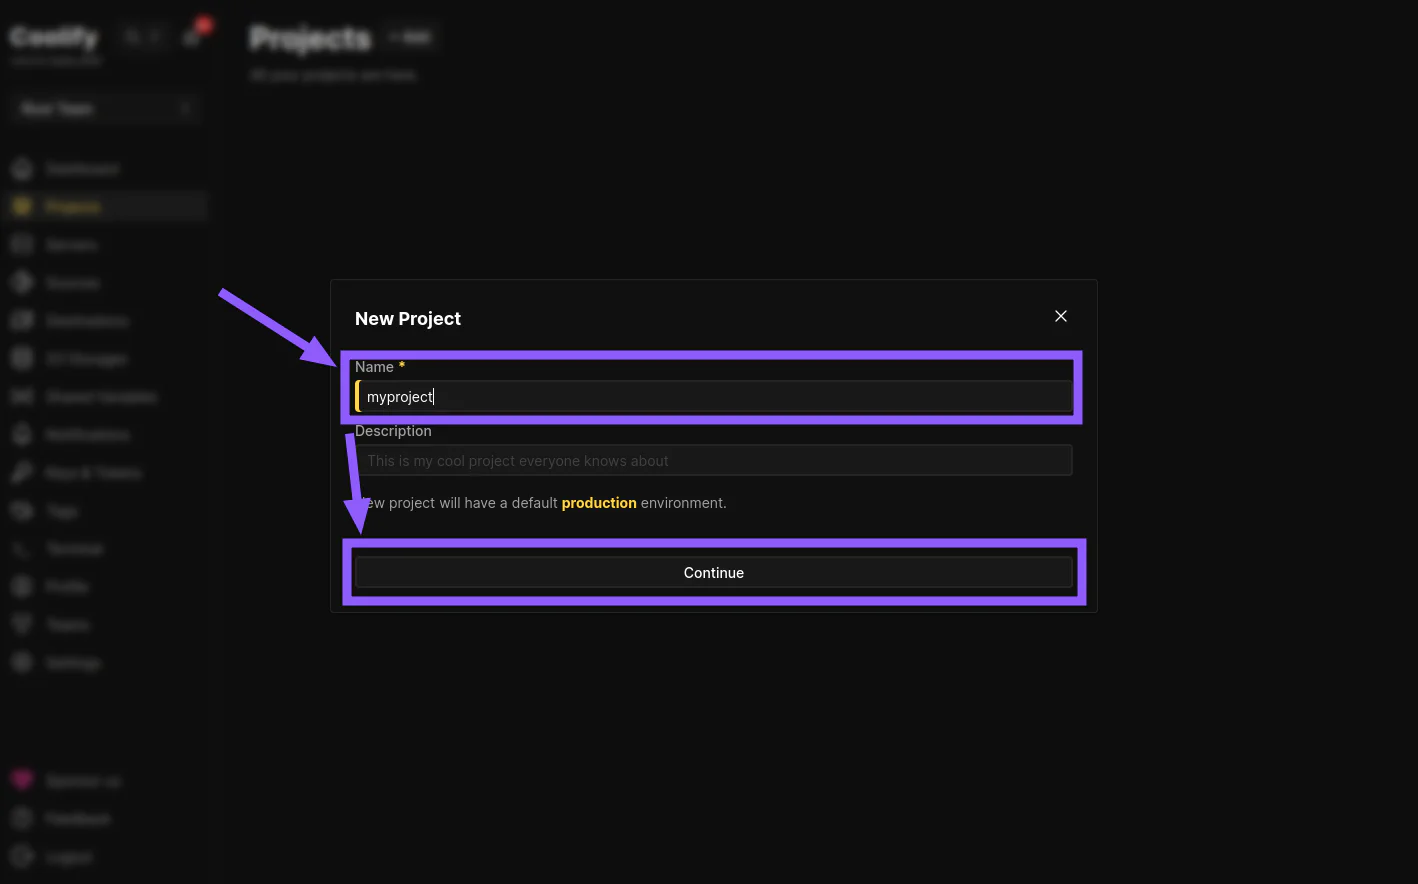
Create Project
Create a new project:
Name it myproject:
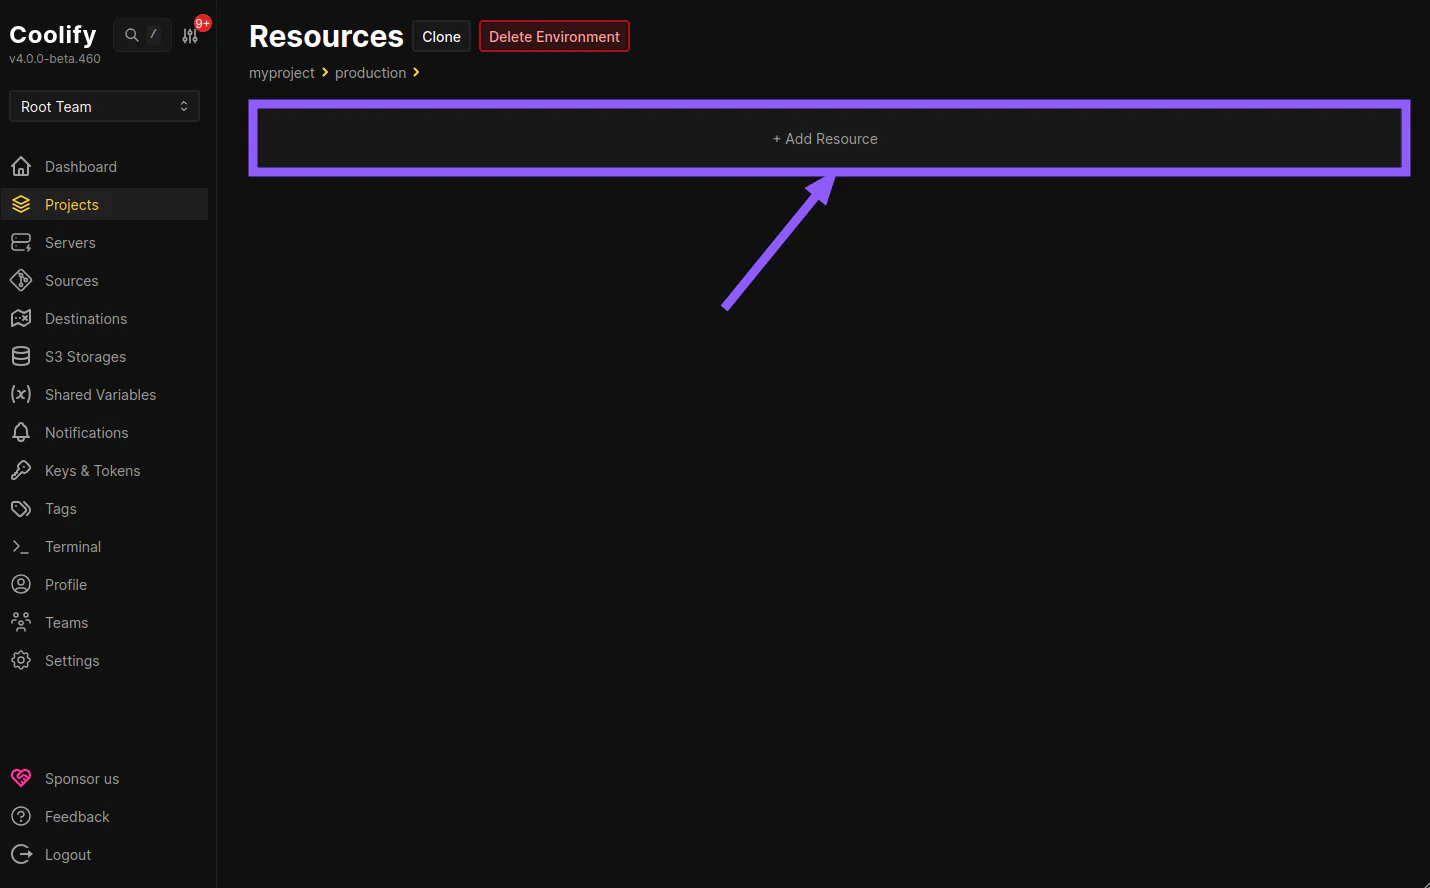
Create an App
Open myproject, and Add Resource:
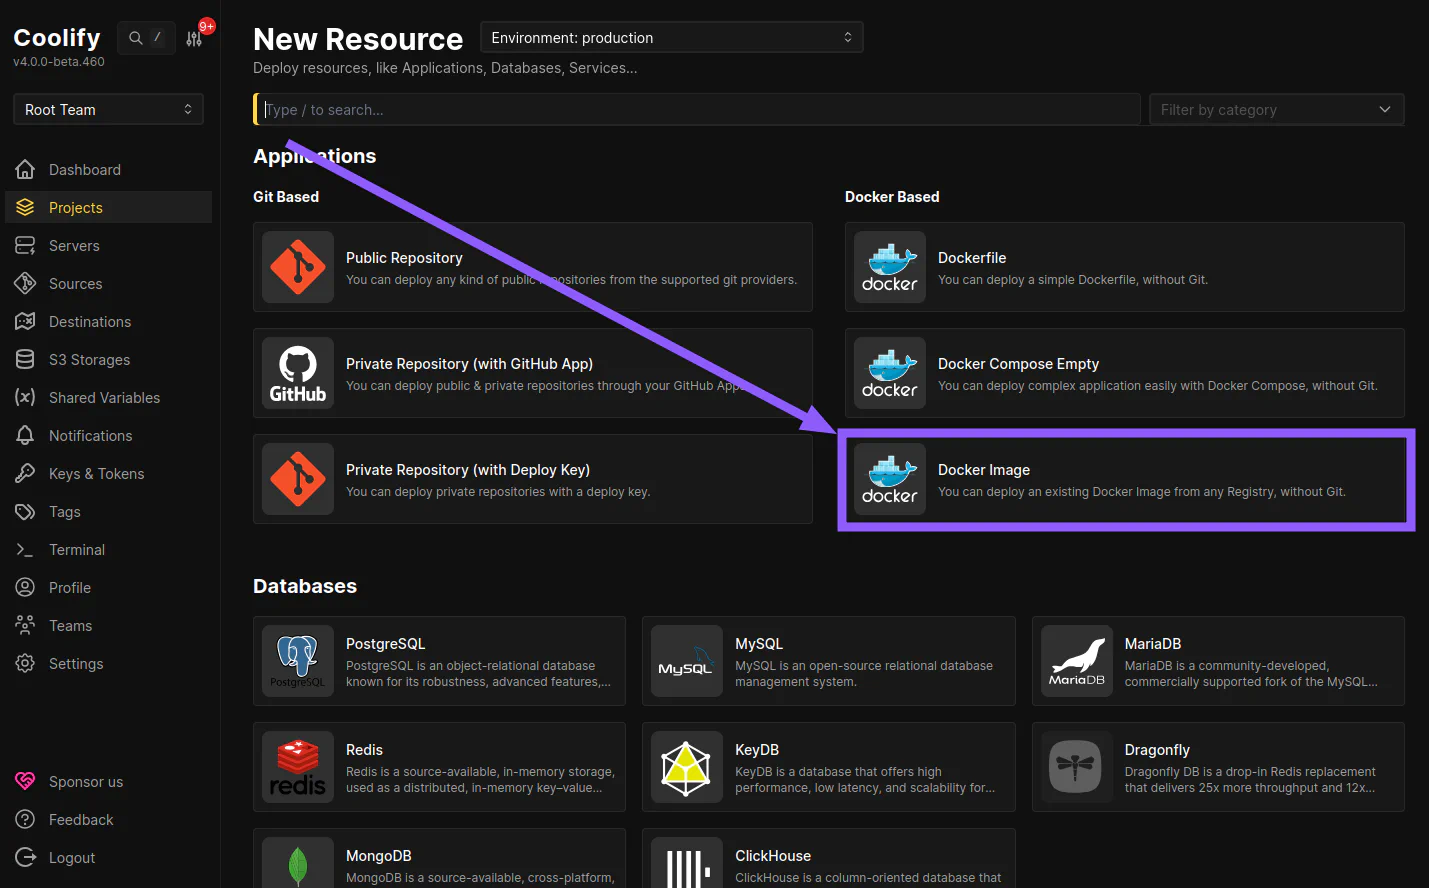
Select Docker Image:
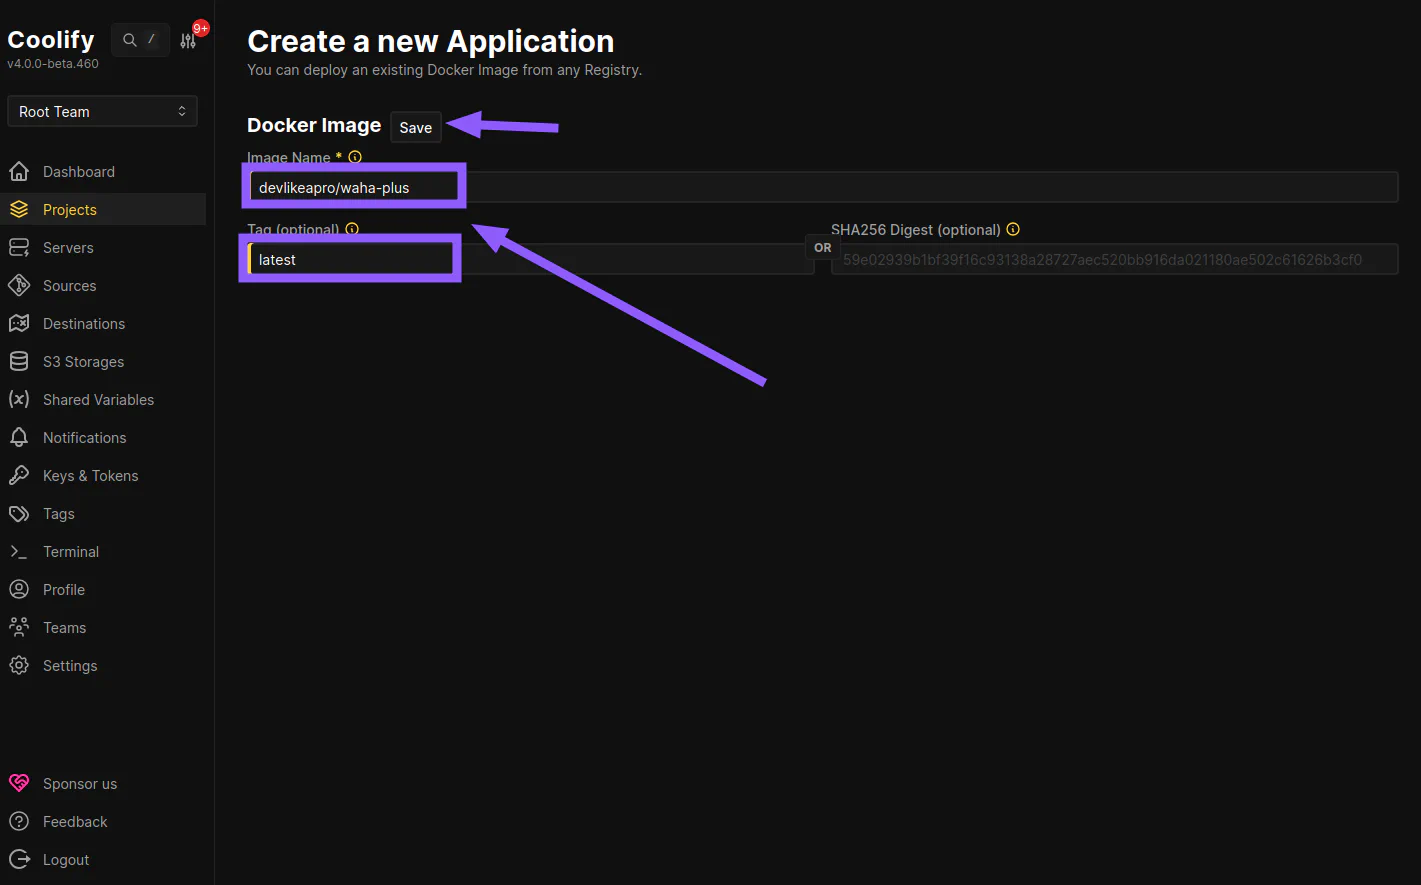
Set the Docker Image:
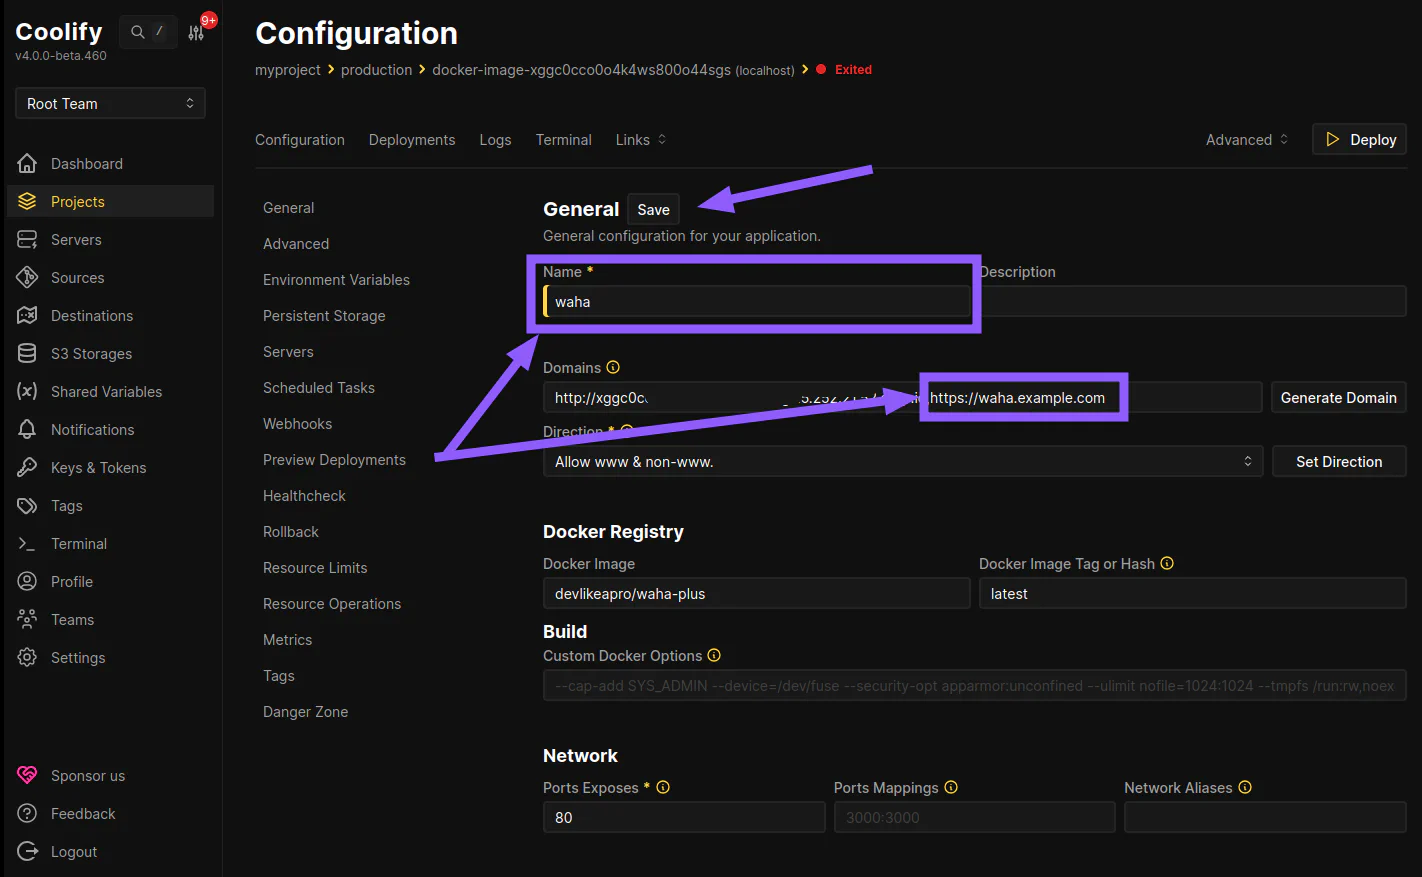
App - General
Open General:
- Change Name to
waha - Add a domain for WAHA in Domains, like
http://abc.{yourip}.sslip.io,https://waha.example.com(optional, you can still use auto generated domain name) - Click Save
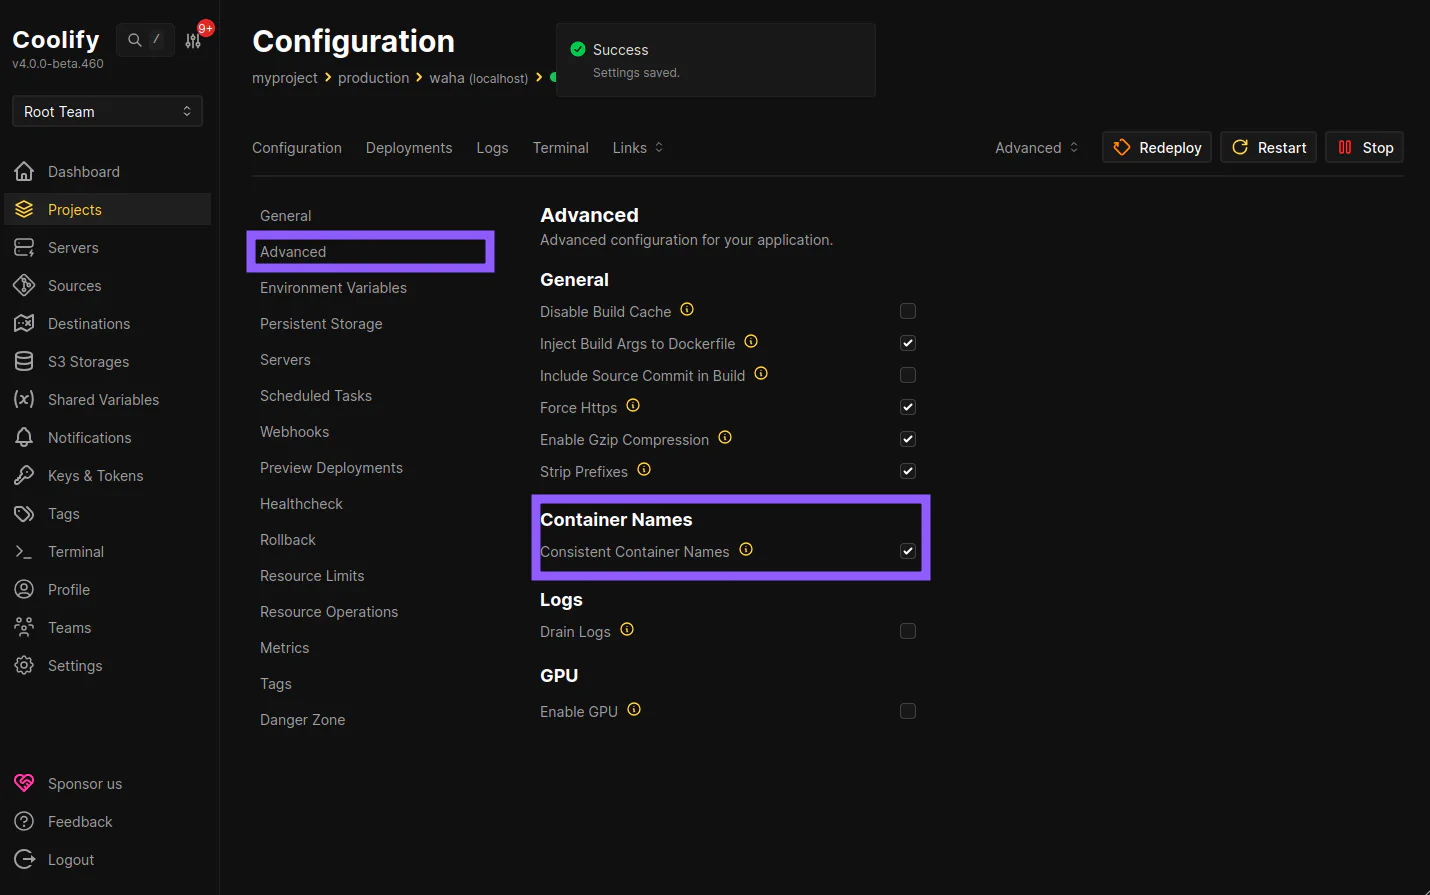
App - Advanced
Open Advanced, in Container Names section enable Consistent Container Names:
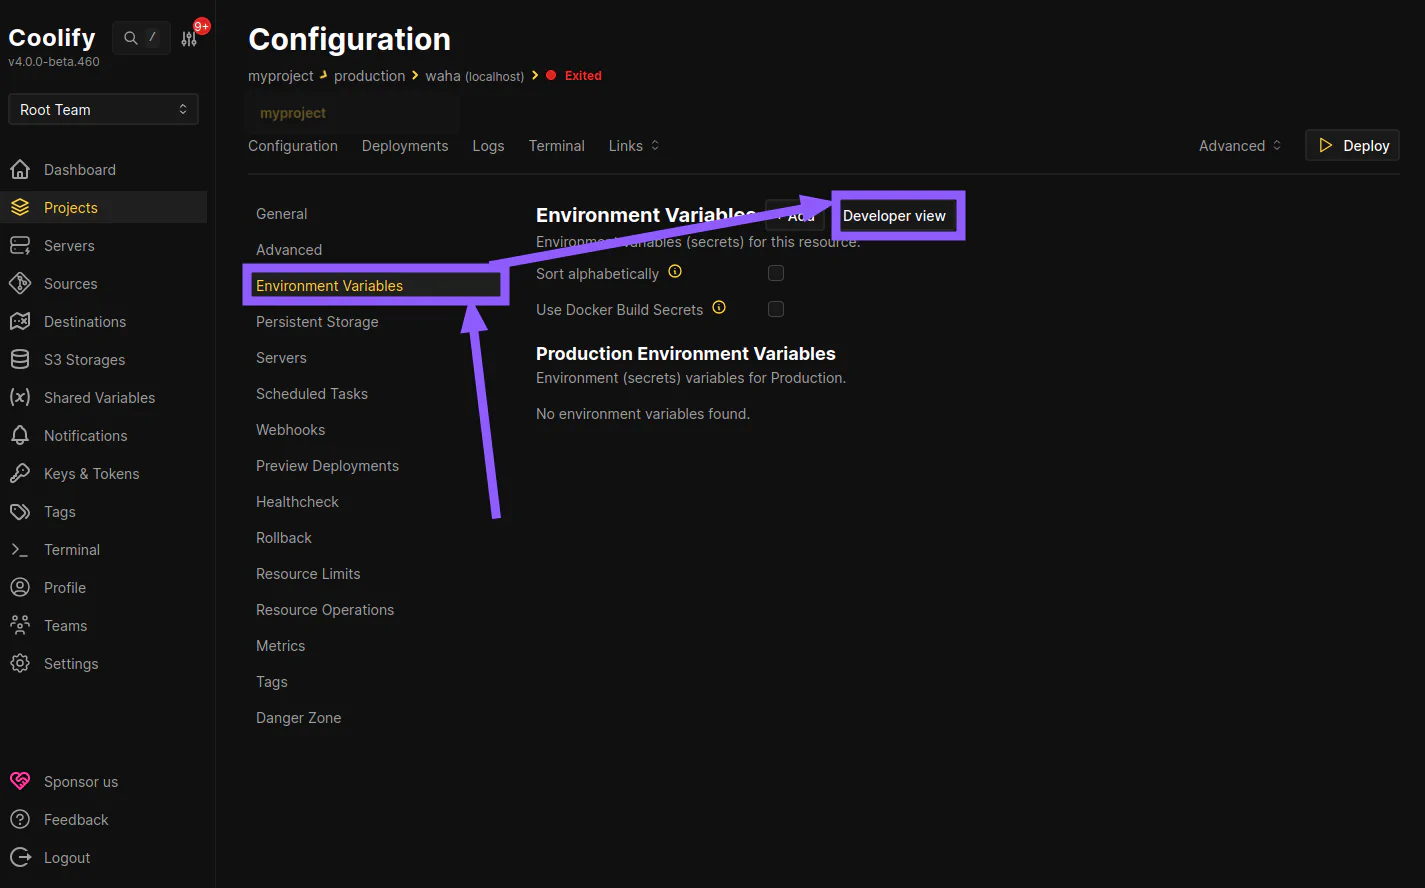
App - Environment Variables
Go to Environment Variables, click Developer view and use values below:
Change Secrets
In the example below, we use 44..44 for some environment variables.
You must generate your own using this command:
uuidgen | tr -d '-'Change WAHA_BASE_URL and WAHA_PUBLIC_URL
Change WAHA_BASE_URL and WAHA_PUBLIC_URL to your domain, like https://waha.example.com
# ====================
# ===== SECURITY =====
# ====================
WAHA_API_KEY=44444444444444444444444444444444
WAHA_DASHBOARD_USERNAME=admin
WAHA_DASHBOARD_PASSWORD=44444444444444444444444444444444
WHATSAPP_SWAGGER_USERNAME=admin
WHATSAPP_SWAGGER_PASSWORD=44444444444444444444444444444444

# Base URL for the API (used for webhooks, file URLs, etc.)
WAHA_BASE_URL=https://waha.example.com
WAHA_PUBLIC_URL=https://waha.example.com


# Disable Dashboard or Swagger
WAHA_DASHBOARD_ENABLED=True
WHATSAPP_SWAGGER_ENABLED=True

# ==================
# ===== COMMON =====
# ==================
# WhatsApp engine (WEBJS is default, GOWS or NOWEB for better performance)
WHATSAPP_DEFAULT_ENGINE=WEBJS

# Namespace for sessions storage - set to "all" so sessions are shared across
# all engines, allowing you to switch engines without losing the session list
WAHA_NAMESPACE=all

# "Firefox (YourApp)" in Linked Devices
# WAHA_CLIENT_DEVICE_NAME=YourApp


# ===================
# ===== LOGGING =====
# ===================
# Log format: JSON (for log management systems) or PRETTY (for development)
WAHA_LOG_FORMAT=JSON

# Log level: info, debug, error, warn
WAHA_LOG_LEVEL=info

# Don't print QR codes in logs
WAHA_PRINT_QR=False

# =========================
# ===== MEDIA STORAGE =====
# =========================
# Local storage (default)
WAHA_MEDIA_STORAGE=LOCAL
WHATSAPP_FILES_LIFETIME=0
WHATSAPP_FILES_FOLDER=/app/.media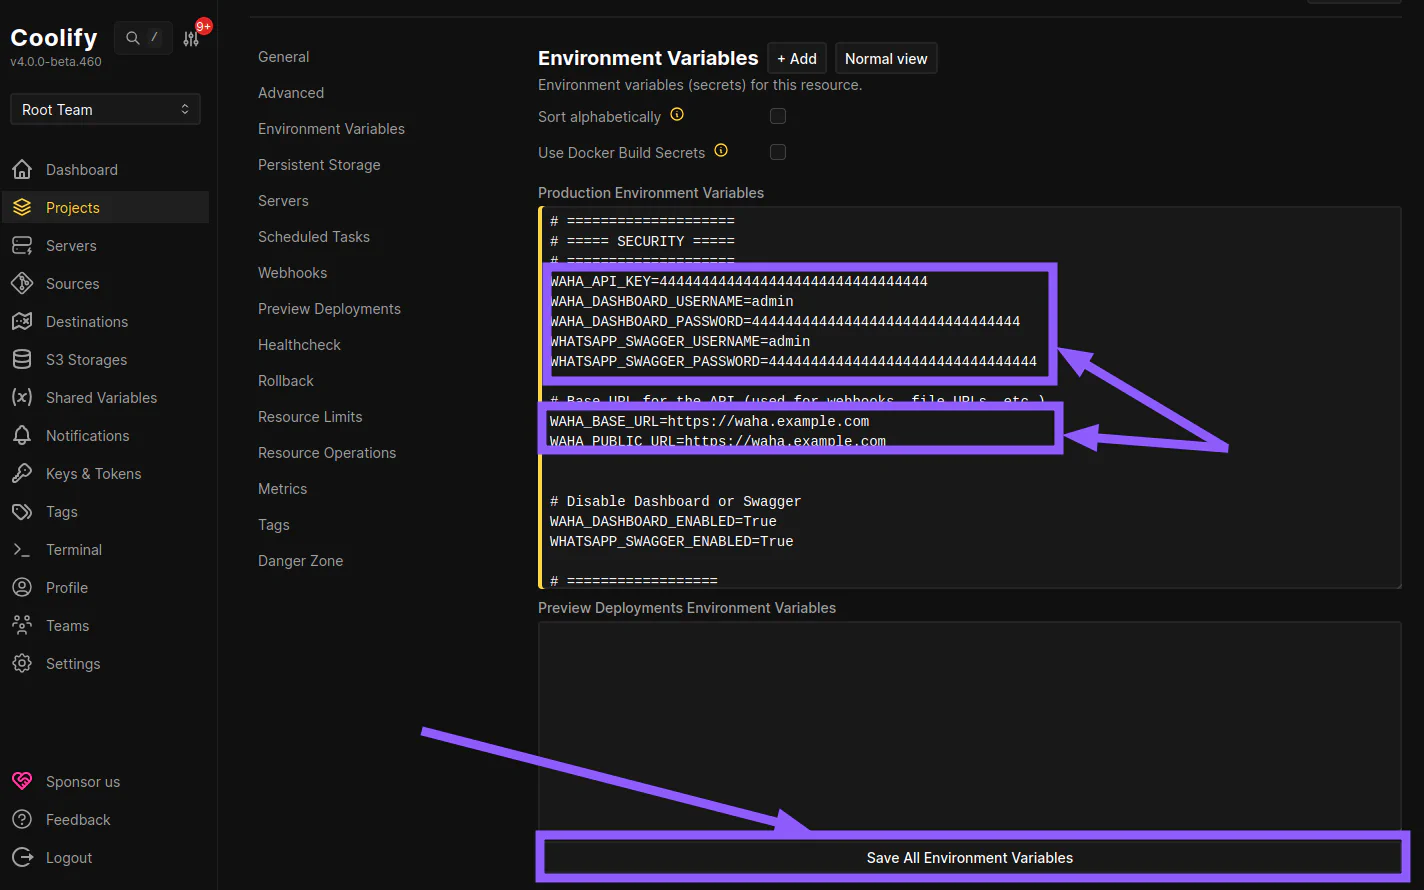
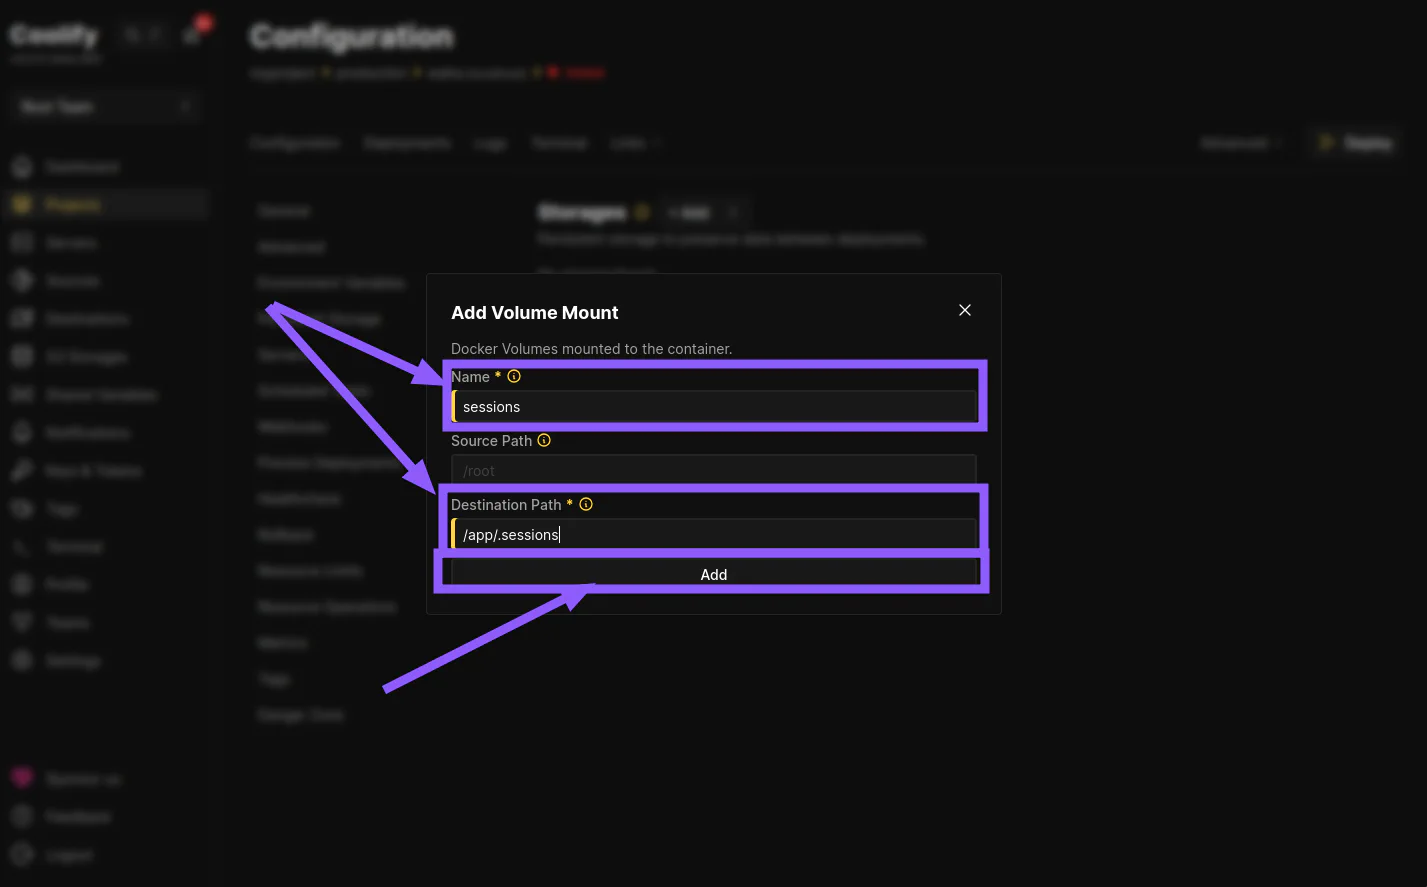
App - Storage
Open Persistent Storage, add a Volume Mount
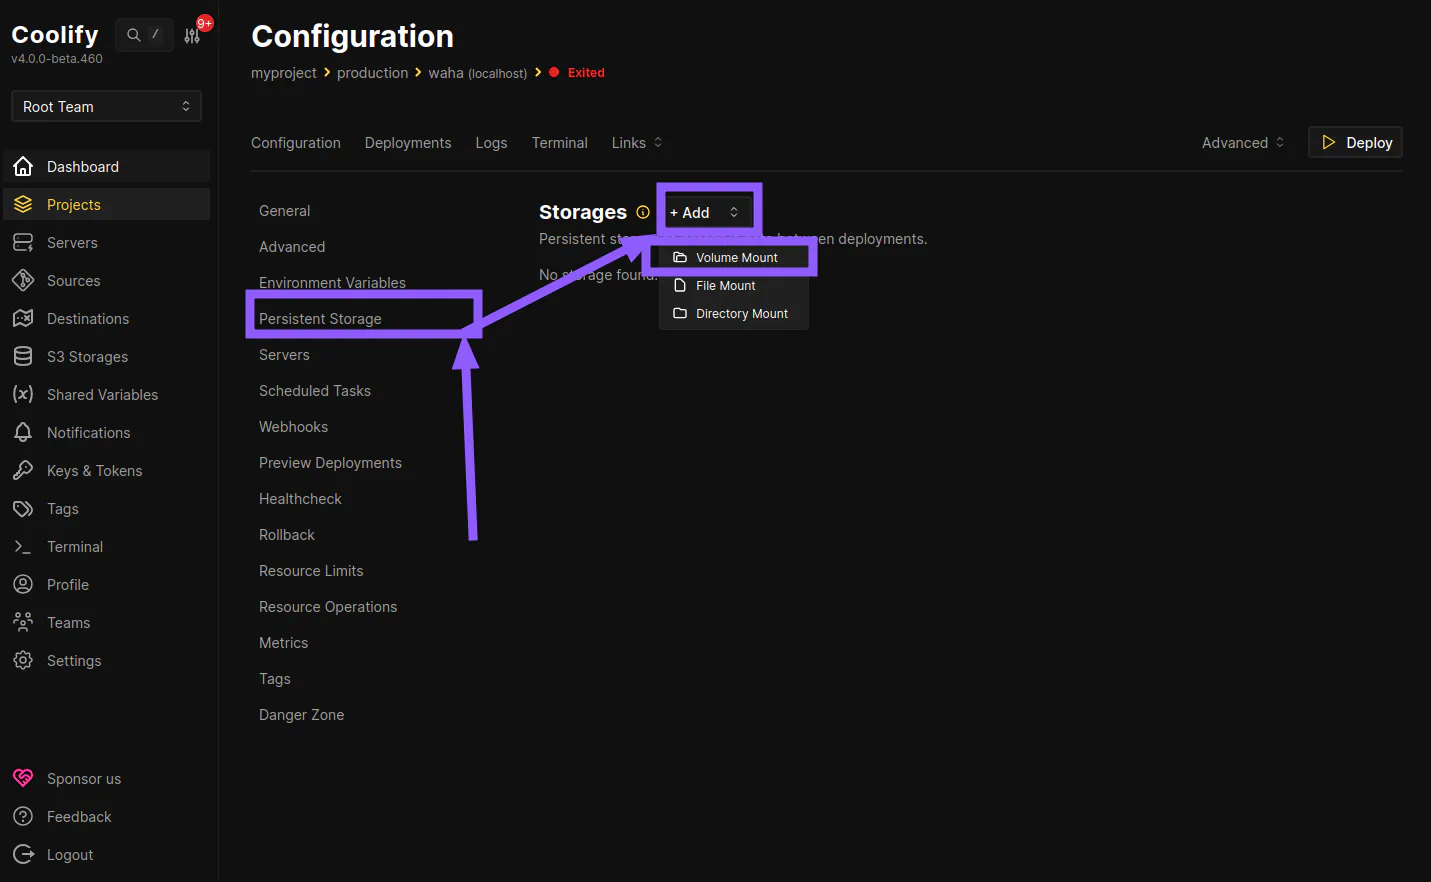
Create 2 volumes:
- Sessions
- Name:
sessions - Destination path:
/app/.sessions
- Media
- Name:
media - Destination path:
/app/.media
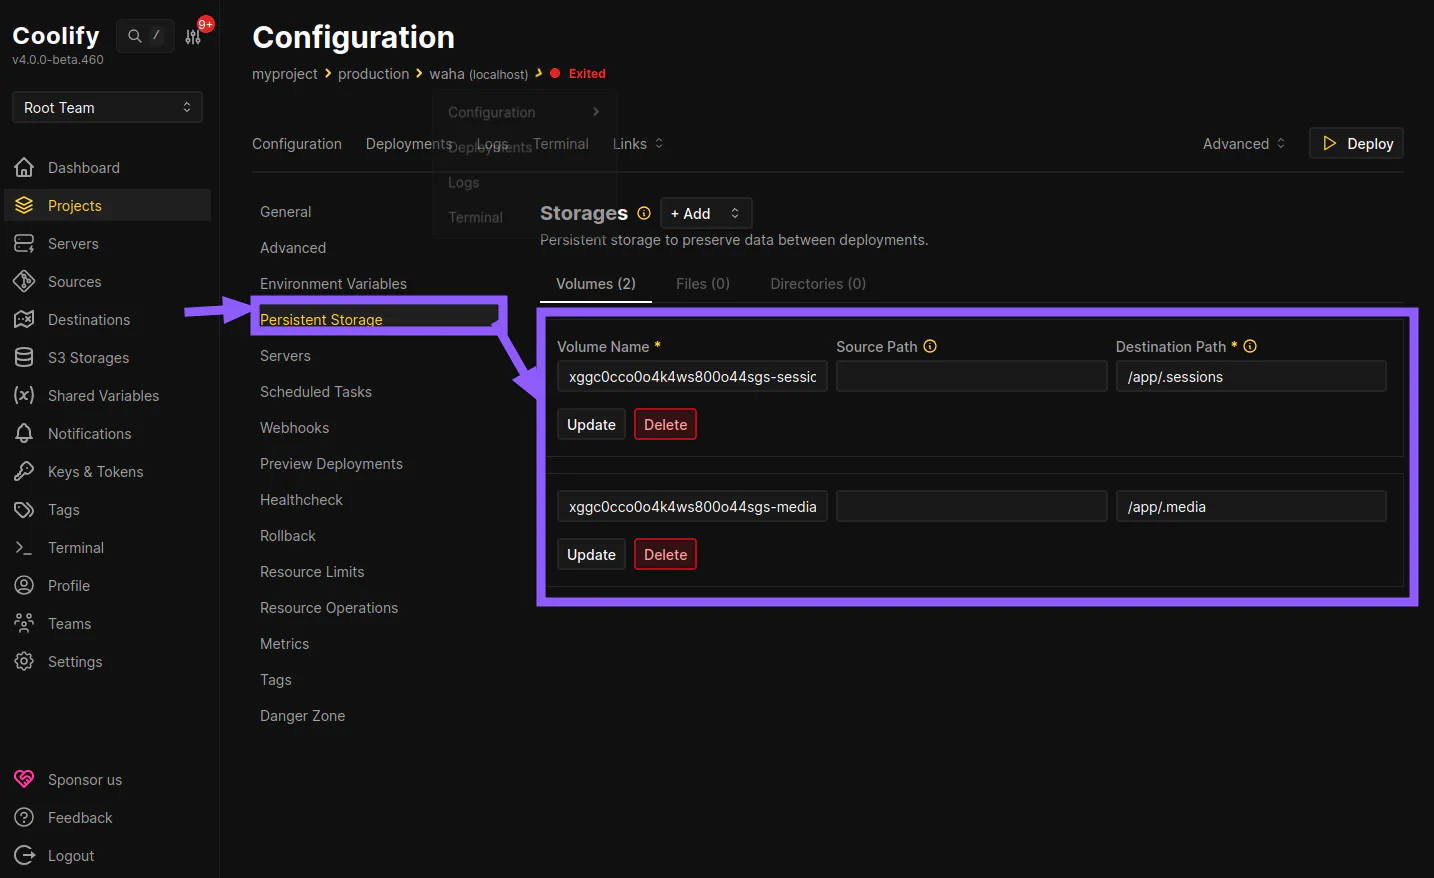
Click on Persistent Storage again to see all volumes:
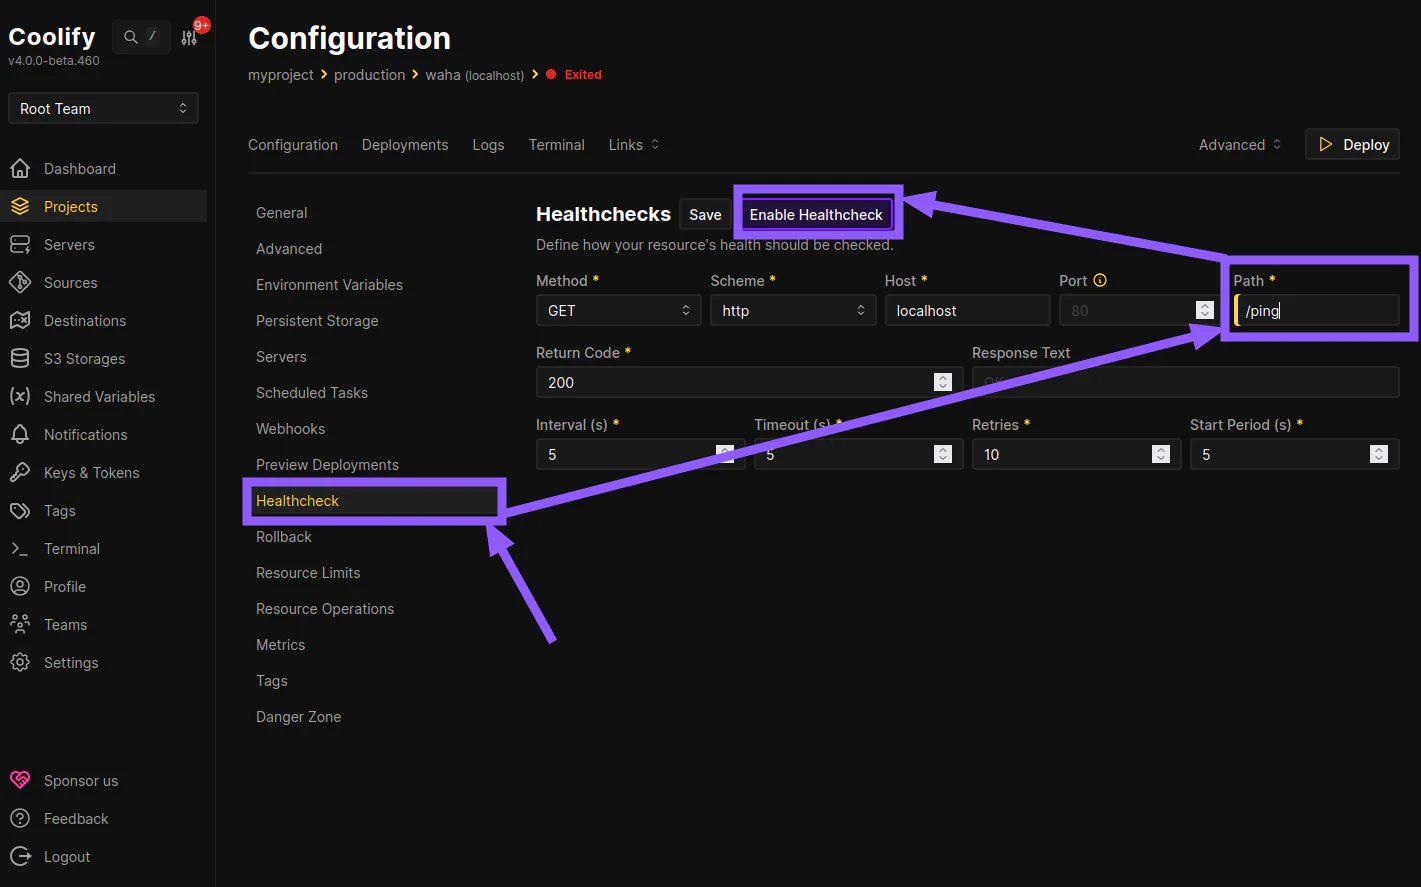
App - Healthcheck
Open Healthcheck, set Path as ping, click Enable Healthcheck
App - Deployments
Open Deployments, click Deploy to pull the image and start the app:

When it finishes, click Links and open any link to open WAHA:

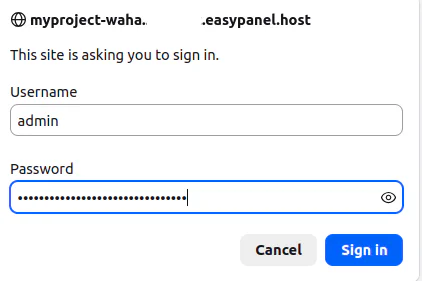
Check WAHA
Use admin as Username and your generated WAHA_DASHBOARD_PASSWORD to log in:
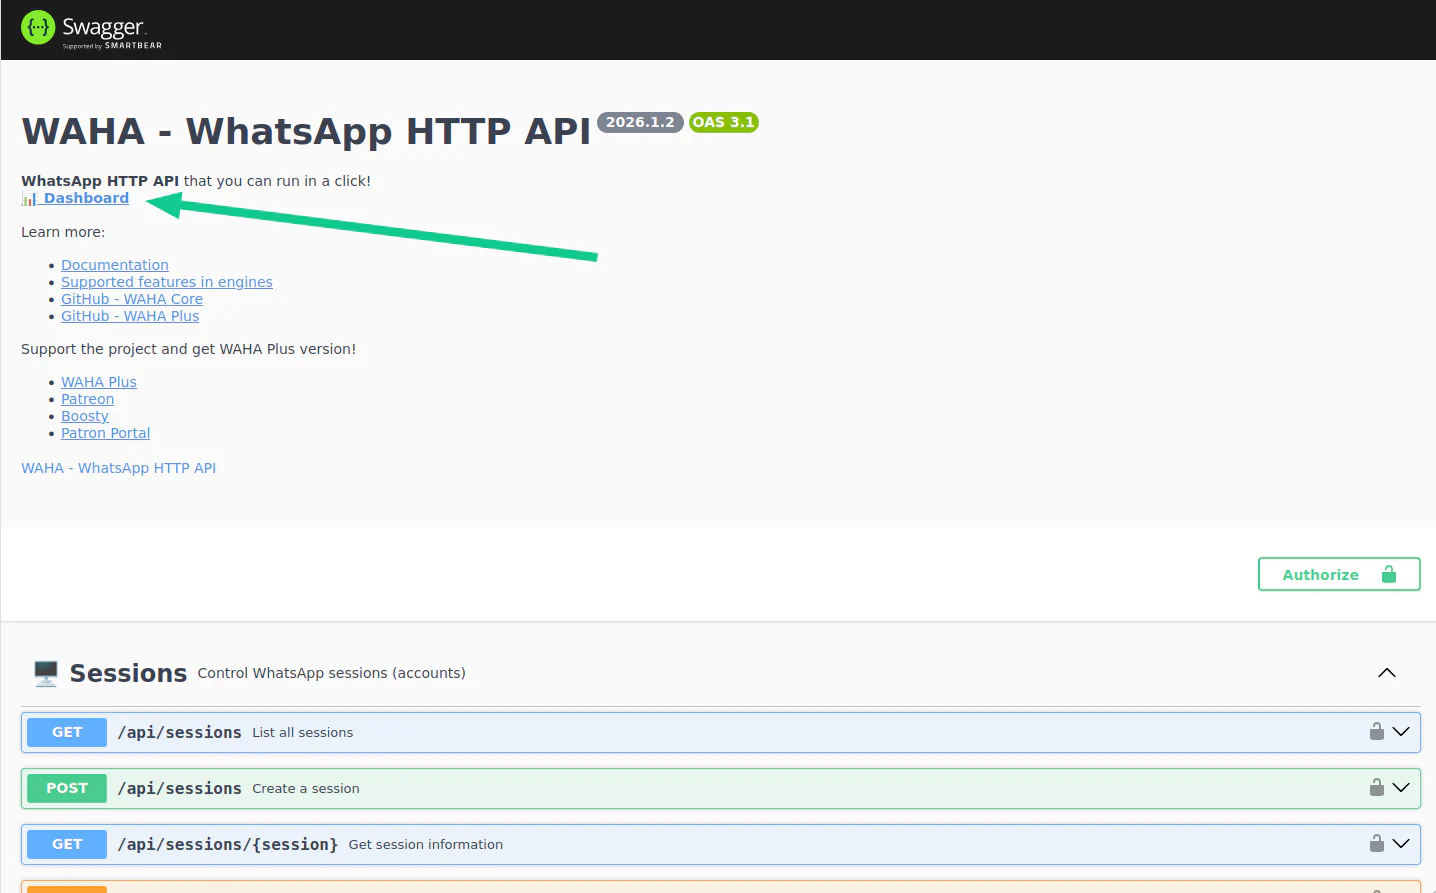
You’ll see Swagger documentation. Now click Dashboard:
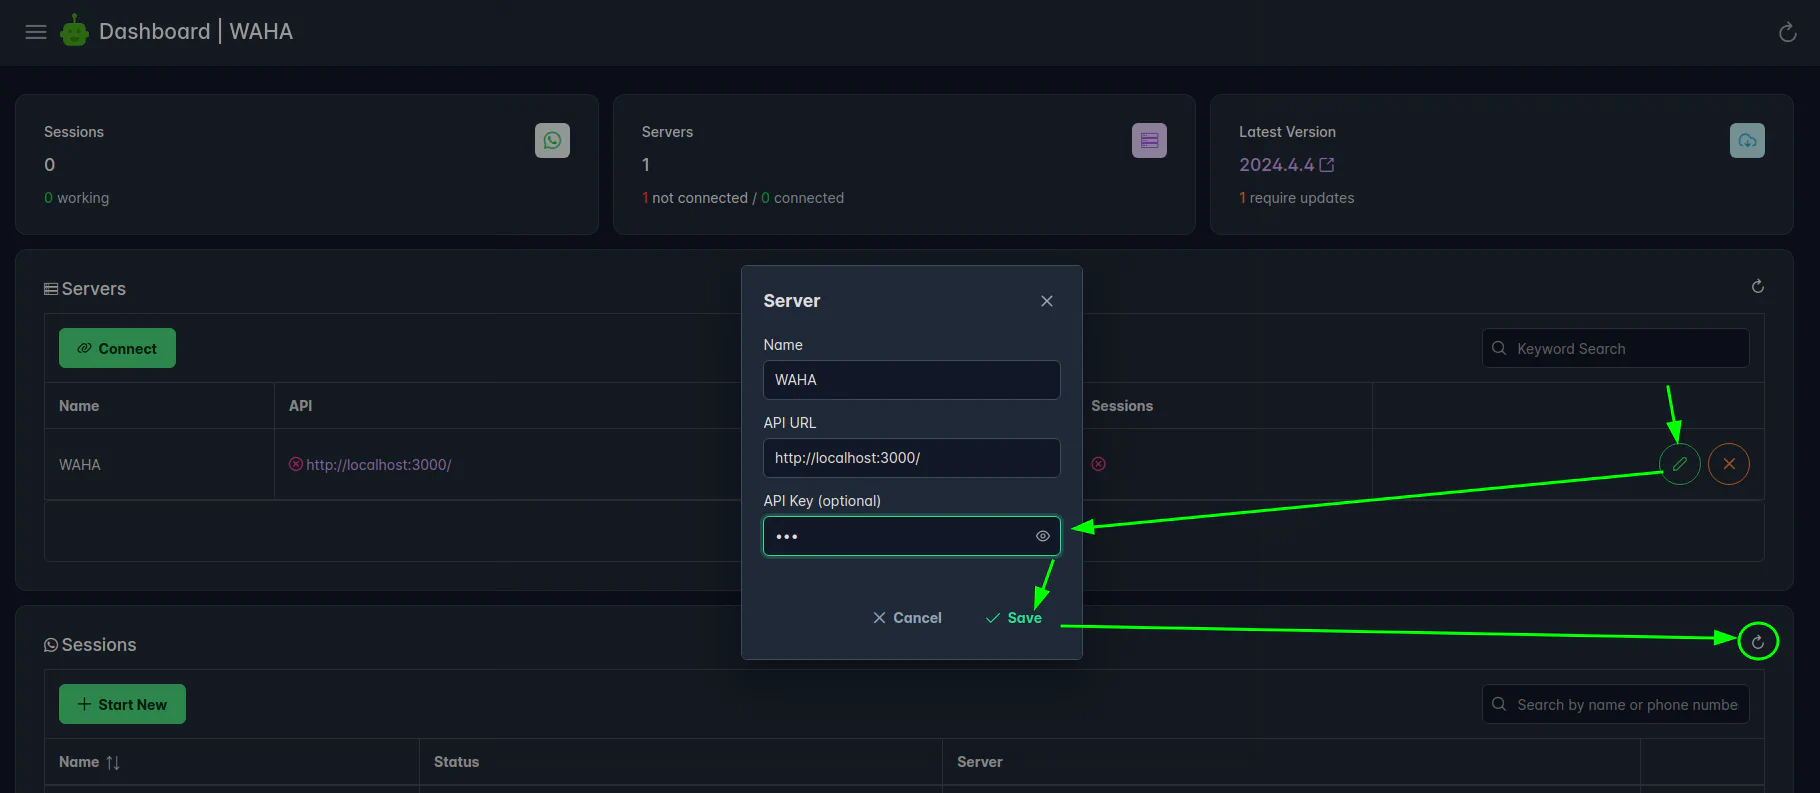
Enter your WAHA_API_KEY to connect:
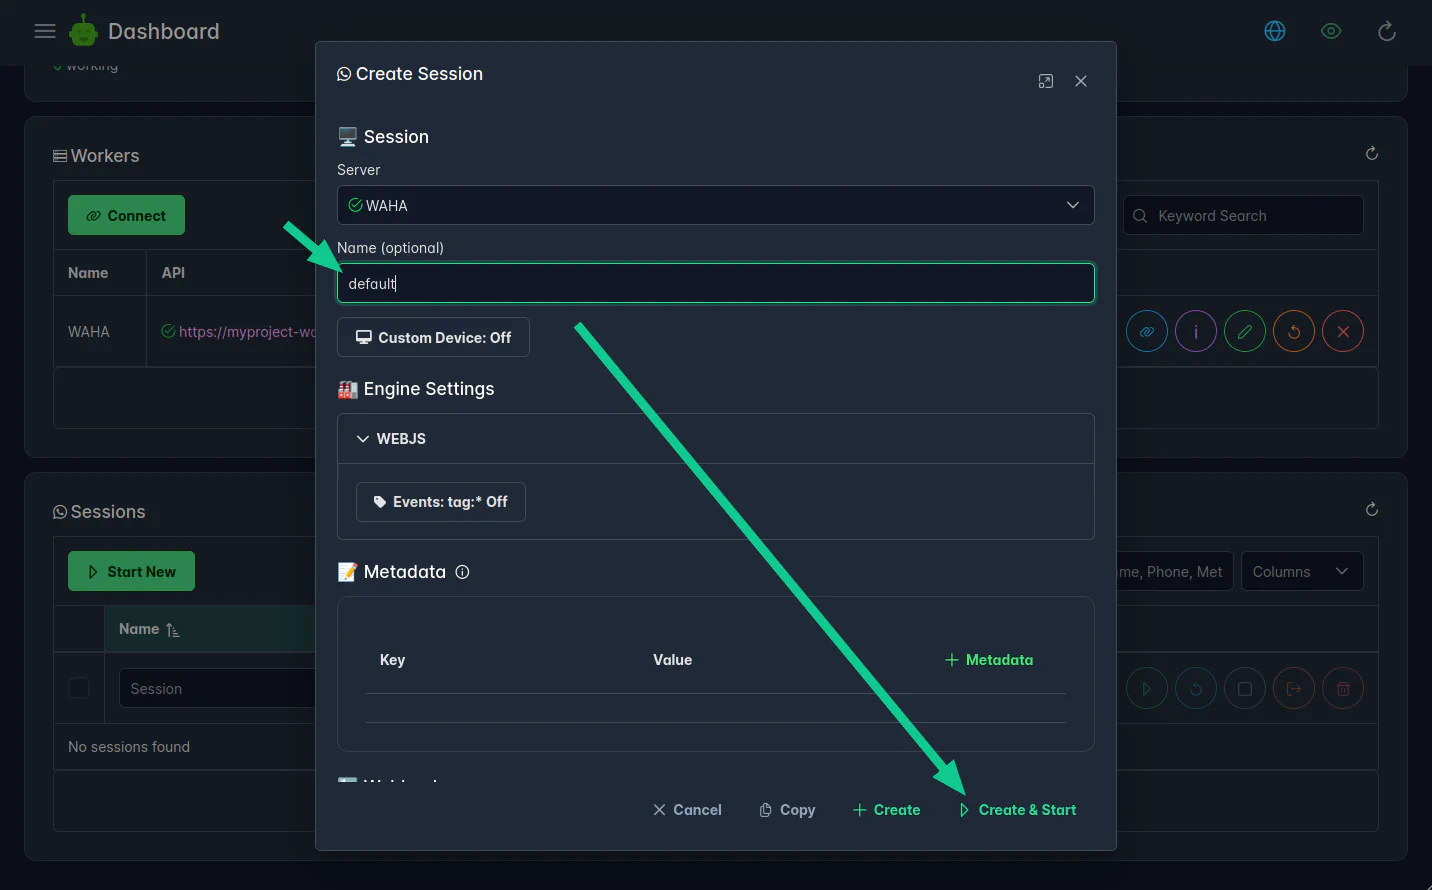
Now you can Create & Start a new session:
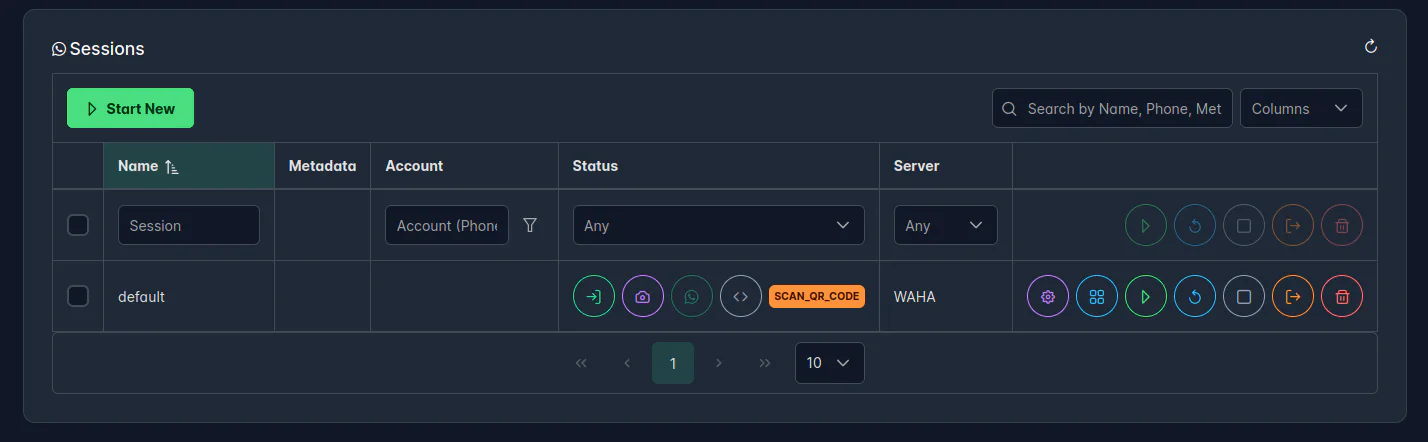
Scan the QR code using your WhatsApp app:
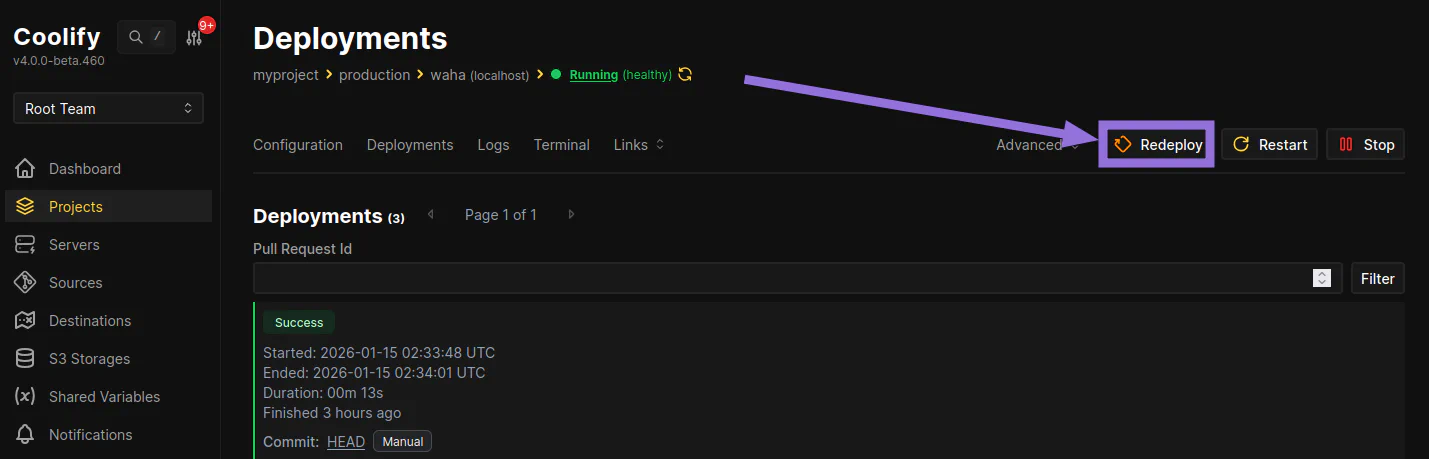
Update
When there’s a new version, click Redeploy to pull the latest image.