🖥️ Sessions
Session represents a WhatsApp Account (Phone Number) connected to WAHA that you can use to send and receive messages.
Features
Here’s the list of features that are available by 🏭 Engines:
🖥️ Sessions - API
| API | WEBJS | WPP | NOWEB | GOWS |
|---|---|---|---|---|
List sessionsGET /api/sessions/ | ✔️ | ✔️ | ✔️ | ✔️ |
Get sessionGET /api/sessions/{name} | ✔️ | ✔️ | ✔️ | ✔️ |
Create sessionPOST /api/sessions/ | ✔️ | ✔️ | ✔️ | ✔️ |
Update sessionPOST /api/sessions/{name}/ | ✔️ | ✔️ | ✔️ | ✔️ |
Delete sessionDELETE /api/sessions/{name}/ | ✔️ | ✔️ | ✔️ | ✔️ |
Start sessionPOST /api/sessions/{name}/start | ✔️ | ✔️ | ✔️ | ✔️ |
Stop sessionPOST /api/sessions/{name}/stop | ✔️ | ✔️ | ✔️ | ✔️ |
Restart sessionPOST /api/sessions/{name}/restart | ✔️ | ✔️ | ✔️ | ✔️ |
Logout from a sessionPOST /api/sessions/logout | ✔️ | ✔️ | ✔️ | ✔️ |
Get screenshotGET /api/screenshot | ✔️ | ✔️ | ➖ | ➖ |
Get meGET /api/sessions/{session}/me | ✔️ | ✔️ | ✔️ | ✔️ |
Get QRPOST /api/{session}/auth/qr | ✔️ | ✔️ | ✔️ | ✔️ |
Request codePOST /api/{session}/auth/request-code | ✔️ | ✔️ | ✔️ | ✔️ |
If you see the feature is not available in the above list, please create a feature request or leave “+1” comment on the existing one.
🖥️ Sessions - Events
| Events | WEBJS | WPP | NOWEB | GOWS |
|---|---|---|---|---|
session.status | ✔️ | ✔️ | ✔️ | ✔️ |
engine.event | ✔️ | ✔️ | ✔️ | ✔️ |
| ✔️ | ✔️ | ✔️ | ✔️ |
Session Lifecycle
Before you can 📤 Send or 📥 Receive messages , you need to Create a session (optionally, Start) and authenticate it using QR code or pairing code.
Here’s Session Lifecycle State Diagram:

Session Status
Here’s the list of possible session.status values:
STOPPED- session is stoppedSTARTING- session is startingSCAN_QR_CODE- session is required to scan QR code or login via phone number.- The
SCAN_QR_CODEis issued every time when QR updated (WhatsApp requirements) - Every time you receive the
session.statusevent withSCAN_QR_CODEstatus, you need to fetch updated QR ->, because it’s changed.
- The
WORKING- session is working and ready to useFAILED- session is failed due to some error. It’s likely either authorization is required again or device has been disconnected from that account.
In FAILED status try to Restart the session and if it doesn’t help - Logout and Start the session again.
Create Session
In order to create (and start) a new session - with Session Config.
POST /api/sessions{
// "name" is Optional - it'll be generated automatically
"name": "default",
"config": {
// Read about Session Config below
...
}
}{
"name": "session_123123123",
// if name is not provided - it'll be generated automatically
"status": "STARTING",
"engine": {
"engine": "WEBJS"
},
"config": {
...
},
"me": null
}Here’s how you can call it from various languages:
WAHA uses session name more like “id”, but we call it name for historical and compatibility reasons.
Postpone start
By default, the session starts right after creation.
You can create a session and postpone its start by setting start field to false.
It’ll create a session in STOPPED status, and you can start it later by calling POST /api/sessions/{session}/start.
{
  "name": "default",
  "start": false
}
Session Config
Full possible config for a session:
{
  "name": "default",
  "config": {
    "debug": true,
    // Only for NOWEB engine
    "noweb": {
      "store": {
        "enabled": true,
        "fullSync": false
      }
    },
    // Only for WEBJS engine
    "webjs": {
      "tagsEventsOn": false
    },
    // Device name in WhatsApp -> Linked Devices
    "client": {
      "deviceName": "TEST",
      "browserName": "Chrome"
    },
    // Use "metadata" to save additional information.
    "metadata": {
      "user.id": "123",
      "user.email": "email@example.com"
    },
    "ignore": {
      "status": false,
      "groups": false,
      "channels": false
    },
    "webhooks": [
      {
        "url": "https://webhook.site/11111111-1111-1111-1111-11111111",
        "events": [
          "message"
        ],
        // Optional
        "hmac": {
          "key": "your-secret-key"
        },
        // Optional
        "customHeaders": [
          {
            "name": "X-My-Custom-Header",
            "value": "Value"
          }
        ],
        // Optional
        "retries": {
          "policy": "constant",
          "delaySeconds": 2,
          "attempts": 15
        }
      }
    ],
    // Optional
    "proxy": {
      "server": "localhost:3128",
      // Optional - username, password
      "username": "username",
      "password": "P@ssw0rd"
    }
  }
}
Device name
You can customize how the session shows up under WhatsApp → Linked Devices.

{
  "name": "default",
  "config": {
    "client": {
      "deviceName": "TEST",
      "browserName": "Chrome"
    }
  }
}
or you can set it via ⚙️ Configuration → Sessions - Device Name.
WAHA_CLIENT_DEVICE_NAME=TEST
WAHA_CLIENT_BROWSER_NAME=Chrome
GOWS
GOWS supports custom device names only via environment variables for now - see ⚙️ Configuration → Sessions - Device Name.
Pairing code limitations
Custom device names are applied only for the QR scan flow. Pairing code auth is likely to fail if a custom device name is set.
Use a real browser name
We recommend changing only the device name and keeping a real browser name: Chrome, Firefox, IE, Opera, Safari, Edge.
Metadata
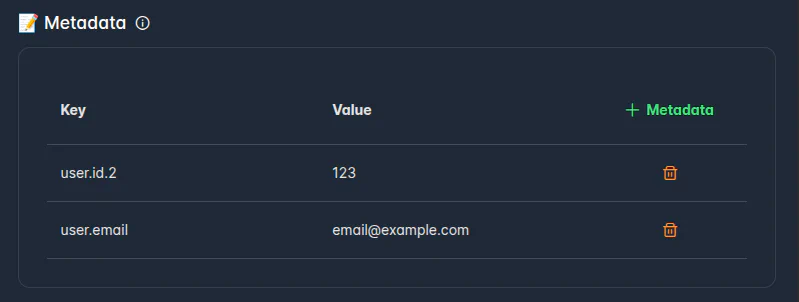
metadata is an attribute on Session objects that lets you store more information,
structured as key-value pairs,
to sessions for your own use and reference.
For example, you can store your user’s unique identifier from your system.
Associated metadata field is available in:
- List Sessions and Get Session responses
- 🔄 Events events
- 📊 Dashboard for view, and search sessions by metadata
{
  "name": "default",
  "config": {
    "metadata": {
      "user.id": "123",
      "user.email": "email@example.com"
    }
  }
}
Sample metadata use cases:
- Link IDs: Attach your system’s unique IDs to a Session object to simplify lookups. For example, add your user or tenant id.
- Customer details: Annotate a customer by storing an internal information (email, customer name) for your future use, so you don’t have to look into two systems.
WAHA does not use metadata for any internal purposes, it’s up to you how to use it.
Webhooks
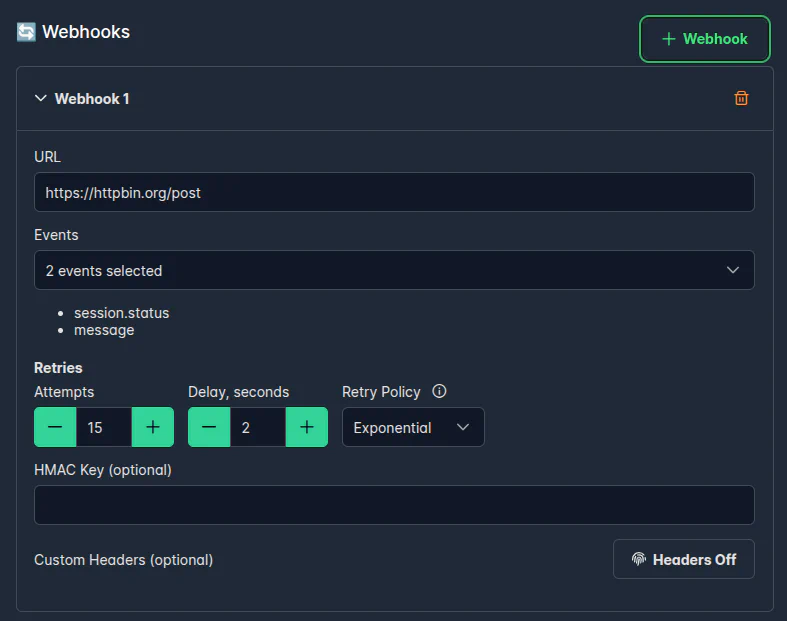
Read more about 🔄 Events - Webhooks.
You can configure webhooks for a session:
{
  "name": "default",
  "config": {
    "webhooks": [
      {
        "url": "https://webhook.site/11111111-1111-1111-1111-11111111",
        "events": [
          "message"
        ]
      }
    ]
  }
}
Full possible webhook config:
{
  "name": "default",
  "config": {
    "webhooks": [
      {
        "url": "https://webhook.site/11111111-1111-1111-1111-11111111",
        "events": [
          "message"
        ],
        // Optional
        "hmac": {
          "key": "your-secret-key"
        },
        // Optional
        "customHeaders": [
          {
            "name": "X-My-Custom-Header",
            "value": "Value"
          }
        ],
        // Optional
        "retries": {
          "policy": "constant",
          "delaySeconds": 2,
          "attempts": 15
        }
      }
    ]
  }
}
👉 Read more about available options on 🔄 Webhooks page.
Ignore
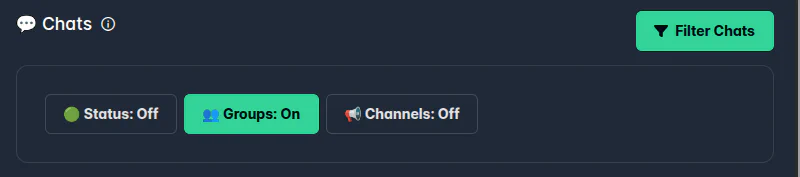
You can ignore events from certain chat types for a session by adding config.ignore.
This helps save resources and avoids unnecessary HTTP requests over
🔄 Webhooks
by filtering at the source.
What is filtered:
- 🔄 Events for the ignored chat types (no webhooks for them)
- 🗄️ Storage do not save messages to database (GOWS/NOWEB engines)
What is NOT filtered:
- 📤 Sending messages to these chats — sending is not limited.
- Low-level engine.event (you still receive them)
{
  "name": "default",
  "config": {
    "ignore": {
      "status": true,
      "groups": false,
      "channels": true,
      "broadcast": true
    }
  }
}config.ignore.status=true- ignore 🟢 Statusconfig.ignore.groups=true- ignore 👥 Groupsconfig.ignore.channels=true- ignore 📢 Channelsconfig.ignore.broadcast=true- ignore 📡 Broadcast (*@broadcast), excludingstatus@broadcast(useconfig.ignore.statusfor Status)
If you don’t provide config.ignore - it’ll use configuration from environment variables ⚙️ Configuration.
Proxy
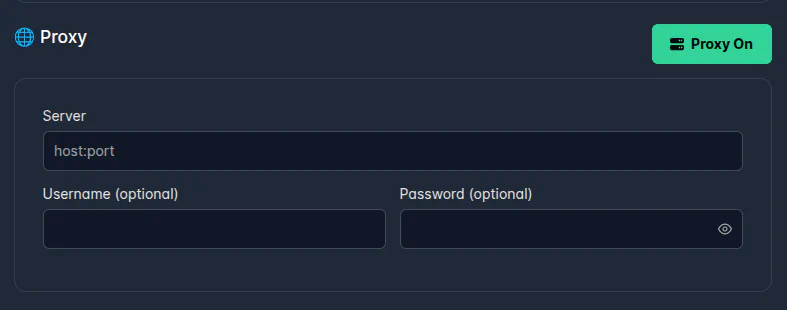
You can configure proxy for a session by setting config.proxy fields when you create or update a session.
server- proxy server address, withouthttp://orhttps://prefixesusernameandpassword- set this if the proxy requires authentication
No authentication
{
  "name": "default",
  "config": {
    "proxy": {
      "server": "localhost:3128"
    }
  }
}
Proxy with authentication
{
  "name": "default",
  "config": {
    "proxy": {
      "server": "localhost:3128",
      "username": "username",
      "password": "P@ssw0rd"
    }
  }
}
You can configure proxy when for all sessions by set up environment variables. Read more about it on Proxy page -> or Configuration page ->.
Apps
You can fetch 🧩 Apps associated with a session using expand=apps query parameter.
Apps API
We’d recommend using 🧩 Apps API to manage apps.
For single session:
GET /api/sessions/{session}?expand=appsFor all sessions:
GET /api/sessions/?expand=apps{
"name": "default",
"apps": [
{
"id": "app_default",
"session": "default",
"app": "calls",
"config": {
"dm": {
"reject": true,
"message": "📞❌ We don't take calls right now.\n🎤 Please send a voice message or 📝 text — we'll reply ASAP!"
},
"group": {
"reject": true,
"message": "📞❌ We don't take calls right now.\n🎤 Please send a voice message or 📝 text — we'll reply ASAP!"
}
},
"enabled": true
}
]
}You can create a session or update a session with associated apps using apps field in the body.
POST /api/sessionsPUT /api/sessions/{session}{
"name": "default",
"apps": [
{
"app": "calls",
"id": "app_default",
"session": "",
"config": {
"dm": {
"reject": true,
"message": "📞❌ We don't take calls right now.\n🎤 Please send a voice message or 📝 text — we'll reply ASAP!"
},
"group": {
"reject": true,
"message": "📞❌ We don't take calls right now.\n🎤 Please send a voice message or 📝 text — we'll reply ASAP!"
}
}
}
]
}Use Long Random Id for ChatWoot App
Use long, random string for app: chatwoot id field!
uuidgen | tr -d '-'
> 2e1005a40ef74edda01ffb1ade877fd3
app_2e1005a40ef74edda01ffb1ade877fd3
WEBJS
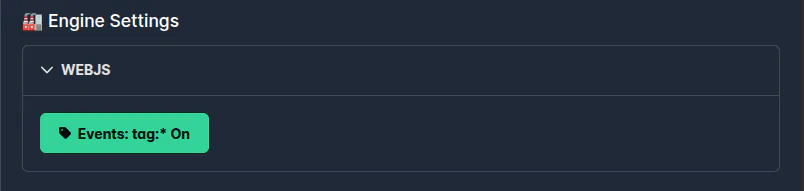
You can configure WEBJS-specific options per session via config.webjs.
tagsEventsOn— Enable emission of specialtag:*engine 🔄 Events - required forpresence.updateandmessage.ack.
WARNING: Enabling tagsEventsOn this may have a performance and stability impact. Disabled by default.
{
  "name": "default",
  "config": {
    "webjs": {
      "tagsEventsOn": false
    }
  }
}
GOWS
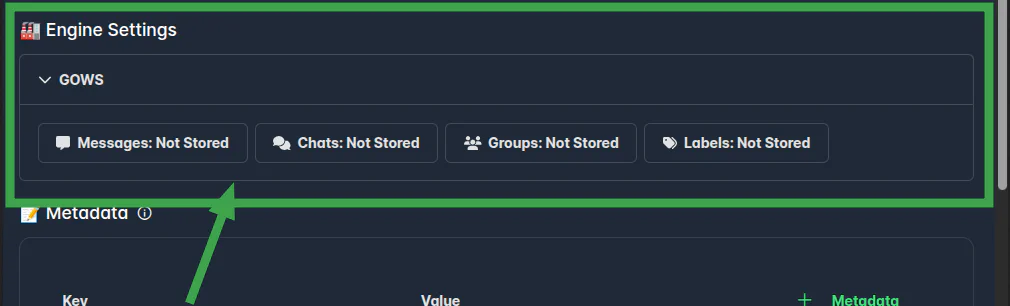
You can configure GOWS-specific options per session via config.gows.
storage.messages- Store messages locally. Set tofalseto disable.storage.groups- Store groups locally. Set tofalseto disable.storage.chats- Store chats locally. Set tofalseto disable.storage.labels- Store labels locally. Set tofalseto disable.
If a field is omitted or set to null, storage remains enabled for that data type.
{
  "name": "default",
  "config": {
    "gows": {
      "storage": {
        "messages": true,
        "groups": true,
        "chats": true,
        "labels": true
      }
    }
  }
}
NOWEB

NOWEB Engine has a specific store that allows you to save session data.
You need to add config.noweb field to activate the store:
{
  "name": "default",
  "config": {
    "noweb": {
      "store": {
        "enabled": true,
        "fullSync": false
      }
    }
  }
}
👉 Read more about NOWEB Store Configuration.
Debug
You can enable debug mode for a session by setting config.debug to true.
This enables more verbose logs for that session (equivalent to using a WAHA_LOG_LEVEL=debug for that session).
Useful when you’re troubleshooting a specific session.
{
  "name": "default",
  "config": {
    "debug": true
  }
}
For system‑wide logging controls, see ⚙️ Configuration → Logging
- You can increase verbosity even more by setting
WAHA_LOG_LEVEL=trace(use with care in production).
Update Session
In order to update a session - call PUT /api/sessions/{session} with a full new configuration
(see the possible config in Session Config section)
{
  "name": "default",
  "config": {
    "webhooks": [
      {
        "url": "https://webhook.site/11111111-1111-1111-1111-11111111",
        "events": [
          "message"
        ]
      }
    ]
  }
}
Here’s how you can call it from various languages:
⚠️ If the session not in STOPPED status, it’ll be stopped and started with a new configuration.
Start Session
In order to start a session - call
POST /api/sessions/{session}/startHere’s how you can call it from various languages:
🎯 Idempotent operation - you can call it multiple times, and it’ll start the session only if it’s not running.
Stop Session
In order to stop a session - call
POST /api/sessions/{session}/stopHere’s how you can call it from various languages:
ℹ️ Stop doesn’t Log out or Delete anything
🎯 Idempotent operation - you can call it multiple times, and it’ll stop the session only if it’s running.
Restart Session
In order to start a session - call
POST /api/sessions/{session}/restartHere’s how you can call it from various languages:
⚠️ If the session is already running (status is not STOPPED), it’ll be stopped and started.
Logout Session
In order to log out the session - call
POST /api/sessions/{session}/logoutHere’s how you can call it from various languages:
⚠️ If the session is running (not in STOPPED status), it’ll be logged out and started from scratch.
👉 If the session in WORKING status it’ll also remove associated device from Connected Devices list in the app.
ℹ️ Log out removes session information (authentication info and data), but keeps the session’s configuration, so you can start a new session with the same configuration.
Delete Session
In order to delete a session - call
DELETE /api/sessions/{session}Here’s how you can call it from various languages:
⚠️ Delete also logs out the session (removes both session configuration and data).
⚠️ Delete also stops the session if it’s running (session status is not STOPPED)
🎯 Idempotent operation - you can call it multiple times, and it’ll stop the session only if it exists.
List Sessions
To get session list - call
GET /api/sessions[
{
  "name": "default",
  "status": "WORKING",
  "config": {
    "proxy": null,
    "webhooks": [
      {
        "url": "https://webhook.site/11111111-1111-1111-1111-11111111",
        "events": [
          "message",
          "session.status"
        ],
        "hmac": null,
        "retries": null,
        "customHeaders": null
      }
    ],
    "debug": false
  },
  "me": {
    "id": "79111111@c.us",
    "pushName": "WAHA"
  },
  "engine": {
    "engine": "NOWEB"
  }
}
]You can add ?all=true parameter to the request it’ll show you ALL session, including STOPPED.
GET /api/sessions?all=trueGet Session
To get information about a specific session - call
GET /api/sessions/{session}{
"name": "default",
"status": "WORKING",
"config": {
"proxy": null,
"webhooks": [
{
"url": "https://webhook.site/11111111-1111-1111-1111-11111111",
"events": [
"message",
"session.status"
],
"hmac": null,
"retries": null,
"customHeaders": null
}
],
"debug": false
},
"me": {
"id": "79111111@c.us",
"pushName": "WAHA"
},
"engine": {
"engine": "NOWEB"
}
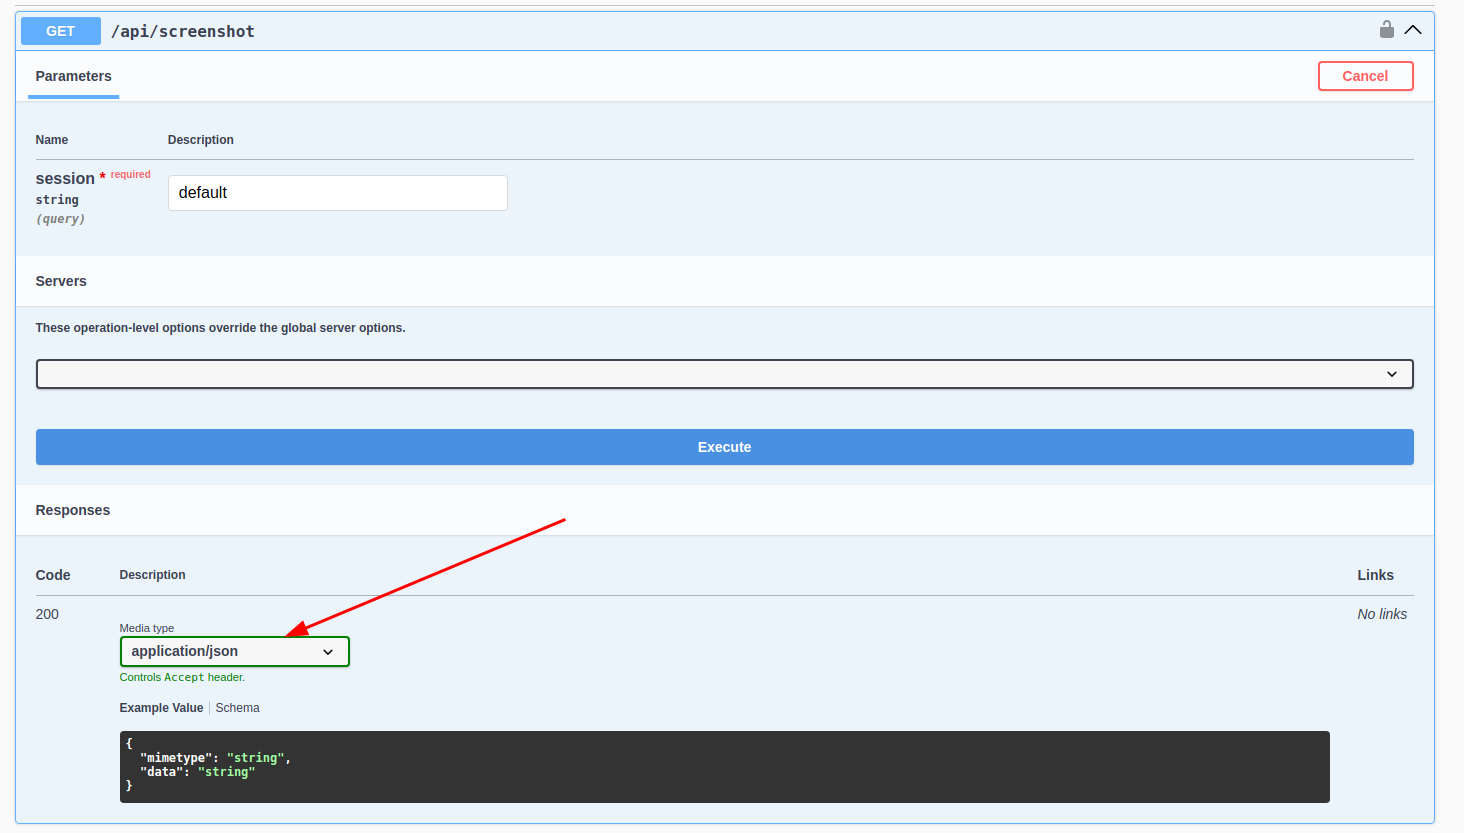
}Get screenshot
Get screenshot of the session’s screen.
Binary
GET /api/screenshot?session=defaultBase64
You can get screenshot in base64 format by adding Accept: application/json header to the request.
GET /api/screenshot?session=defaultAccept: application/json{
"mimetype": "image/png",
"data": "base64-encoded-data"
}You can change it in Swagger by clicking on Media Type dropdown and selecting application/json:
Get me
ℹ️ You’ll get the same info if you request GET /api/sessions/{session} in me field.
Get information about the associated account for that session (if any).
GET /api/sessions/{session}/meAuthenticated and working session’s response:
{
  "id": "11111111111@c.us",
  "pushName": "string"
}
Stopped or not authenticated session returns null:
nullGet QR
The simplest way to authenticate a new session - get QR code and scan it on your device.
QR Code Expires!
The first QR code expires in 60 seconds, then 20 seconds for each subsequent one, up to 6 QR codes total.
After that, the session moves to the FAILED status and needs to be restarted.
👉 General rule:
When you receive a session.status event with SCAN_QR_CODE status, refresh the QR code using API.
GET /api/{session}/auth/qrHere’s how you can call it from various languages:
You’ll get QR image that you can scan and get authenticated
You can get QR in different formats:
- binary image -
GET /api/{session}/auth/qr - base64 image -
GET /api/{session}/auth/qrand setAccept: application/jsonheader - raw -
GET /api/{session}/auth/qr?format=raw
Binary
Binary image - default format, you’ll get image in response
# Get image - binary
GET /api/{session}/auth/qr

# OR
GET /api/{session}/auth/qr?format=image

# OR specify Accept header as well
GET /api/{session}/auth/qr?format=image
Accept: image/png
Base64
Base64 image - you’ll get image in base64 format in response if you set Accept: application/json header.
GET /api/{session}/auth/qr?format=imageAccept: application/json{
"mimetype": "image/png",
"data": "base64-encoded-data"
}You can change it in Swagger by clicking on Media Type dropdown and selecting application/json:
Raw
Raw - you’ll get raw data in response, you can use it to generate QR code on your side with the value.
GET /api/{session}/auth/qr?format=raw{
"value": "value-that-you-need-to-use-to-generate-qr-code"
}Get pairing code
See the list of engines that support the features ->.
You can link a session with phone number - make a request to the endpoint.
POST /api/{session}/auth/request-codeBody example:
{
  "phoneNumber": "12132132130"
}
You’ll get code in the need to enter in WhatsApp app to authenticate the session:
{
  "code": "ABCD-ABCD"
}
👉 Always add QR code auth flow in your application as a fallback, because the pairing code is not always available and works as expected.
Here’s how you can call it from various languages:
Events
Read more about 🔄 Events.
session.status
The session.status event is triggered when the session status changes.
{
  "event": "session.status",
  "session": "default",
  "me": {
    "id": "7911111@c.us",
    "pushName": "~"
  },
  "payload": {
    "status": "WORKING",
    "statuses": [
        {
            "status": "STOPPED",
            "timestamp": 1700000001000,
        },
        {
            "status": "STARTING",
            "timestamp": 1700000002000,
        },
        {
            "status": "WORKING",
            "timestamp": 1700000003000,
        },
    ],
  },
  "engine": "WEBJS",
  "environment": {
    "version": "2023.10.12",
    "engine": "WEBJS",
    "tier": "PLUS"
  }
}
engine.event
Internal event that is triggered when the engine emits an event.
{
  "id": "evt_11111111111111111111111111",
  "session": "default",
  "event": "engine.event",
  "payload": {
    "session": "default",
    "event": "{{engine.EventName}}",
    "data": {
      "field": "value"
    }
  },
  "timestamp": 1742102571277,
  "metadata": {},
  "me": {
    "": null
  },
  "environment": {
    "": null
  }
}
Advanced sessions
With WAHA Plus version you can save session state to avoid scanning QR code everytime, configure autostart options so when the docker container restarts - it restores all previously run sessions!
Session persistent
If you want to save your session and do not scan QR code everytime when you launch WAHA - connect the session storage to the container ->
Autostart
By default, WAHA track which session have been run on which worker and restart it when
worker got restarted. If you want to disable it - set WAHA_WORKER_RESTART_SESSIONS=False in
environment variable.
Multiple sessions
If you want to save server’s CPU and Memory - run multiple sessions inside one docker container! Plus version supports multiple sessions in one container.
DEPRECATED
Before new granular API we have a simple API to control the session.
Kindly switch to new API that allows you to control the session in a more flexible way.
Start
The endpoint Create (if not exists), Update (if existed before) and Start a new session.
POST /api/sessions/startAccepts the same configuration as Create and Update API.
{
  "name": "default",
  "config": {
    "webhooks": [
      {
        "url": "https://webhook.site/11111111-1111-1111-1111-11111111",
        "events": [
          "message"
        ]
      }
    ]
  }
}
Stop
POST /api/sessions/stop- Stop if
logout: false - Stop, Logout and Delete session if
logout: true
{
  "name": "default",
  "logout": true
}
Logout
Logout and Delete session.
POST /api/sessions/logout{
"name": "default"
}