⚡ Quick Start
Step-by-Step guide
On this page, you’re going to install and run WAHA, authenticate the client using a QR code, and send your first message to WhatsApp using the API!
We will guide you through the necessary steps to successfully send your first text message using the WhatsApp API.
We’ve got you covered!
Watch the video tutorial below to see how to send your first message using WAHA
Step 0. Requirements
WAHA works on top of Docker, that’s the only thing you’ll need!

👉 Please follow the Docker official guides to install it on Linux, Windows, and macOS
Why Docker?
Docker makes it easy to ship an all-in-one solution with the runtime and dependencies. You don’t have to worry about language-specific libraries or Chrome installation.
Also, Docker makes installation and update processes so simple, just one command!
Step 1. Download image
Assuming you have installed Docker, let’s download the image! Follow the instructions below:
Step 2. Init WAHA
Generate a .env file that we’ll use in the next step for credentials:
docker run --rm -v "$(pwd)":/app/env devlikeapro/waha init-waha /app/envCredentials generated.
Dashboard and Swagger:
- Username: admin
- Password: 11111111111111111111111111111111
API key:
- 00000000000000000000000000000000
Use it in the Dashboard connection flow: https://waha.devlike.pro/docs/how-to/dashboard/#api-keyRemember these values (you can always check the .env file if you forget them):
- Username / Password:
admin / 11...11- use them to access the Dashboard and Swagger UI - Api Key:
00...00- use it to connect to your server
👉 You can change variables to any values, but use long strings (like UUIDv4)
Step 3. Run WAHA
Run WhatsApp HTTP API:
docker run -it --env-file "$(pwd)/.env" -v "$(pwd)/sessions:/app/.sessions" --rm -p 3000:3000 --name waha devlikeapro/wahaNot a Production-Ready Installation!
☝️ The above command is meant only for initial testing, not for production use.
Please follow the 🔧 Install & Update guide to set up a secure WAHA instance after you finish the quick start guide.
Now, open the 📊 Dashboard at http://localhost:3000/dashboard
Use username/password from the previous step (.env file - WAHA_DASHBOARD_USERNAME / WAHA_DASHBOARD_PASSWORD):
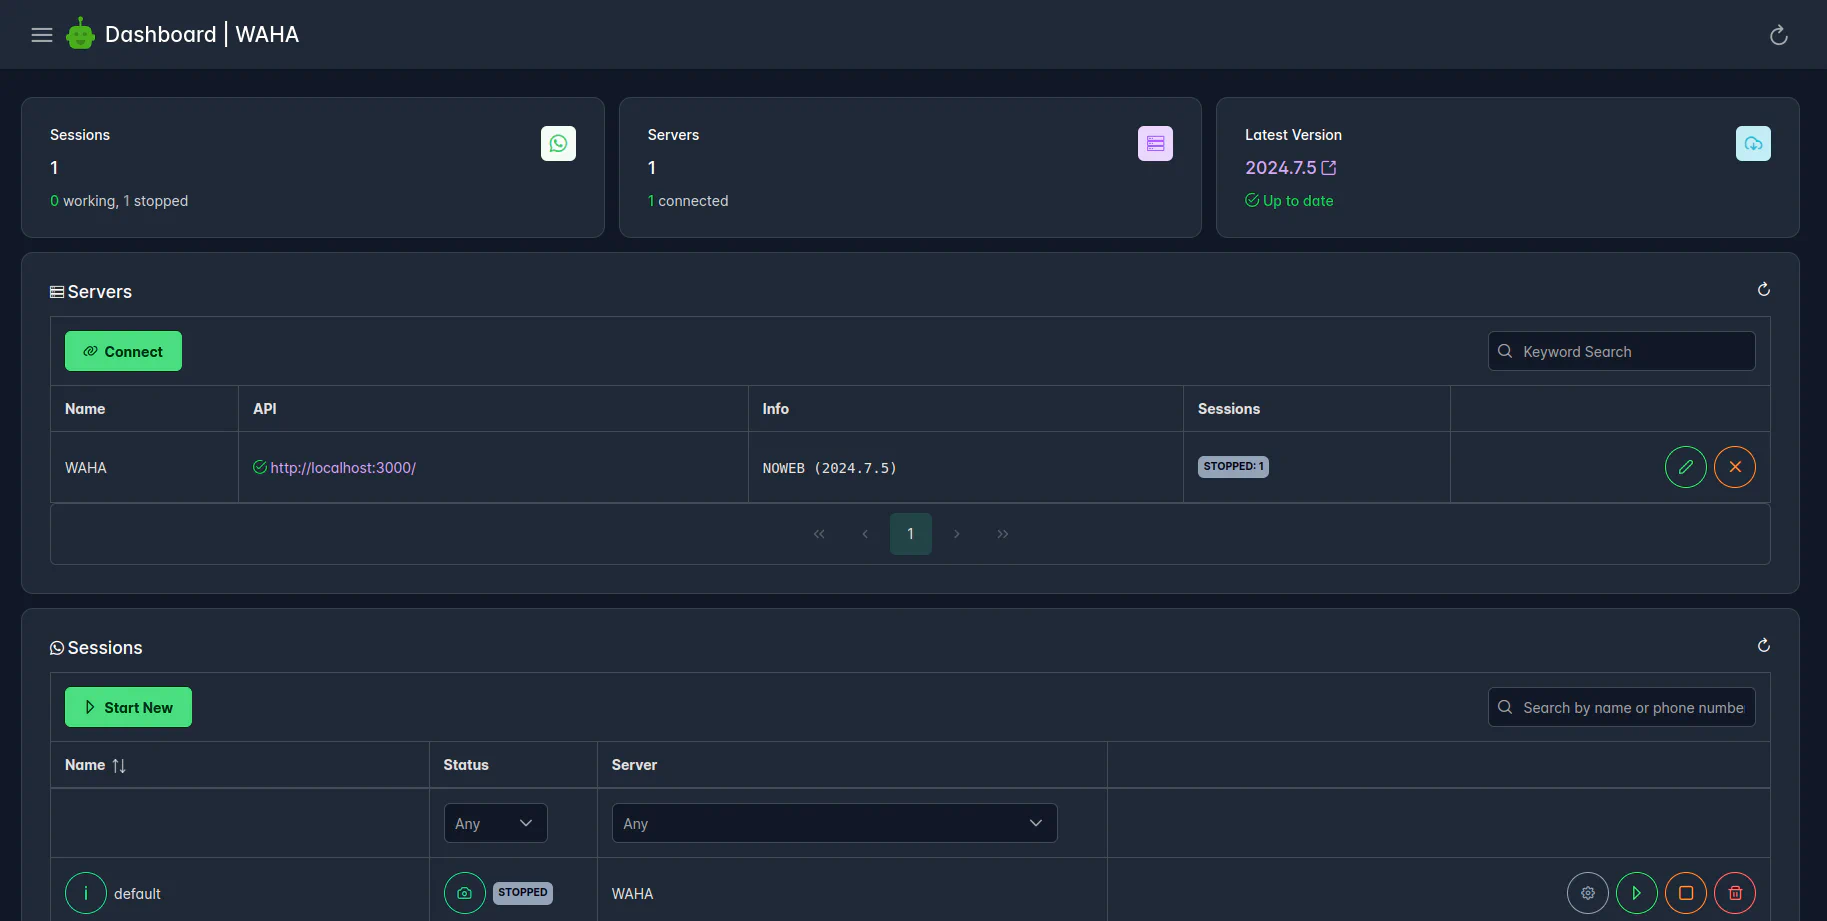
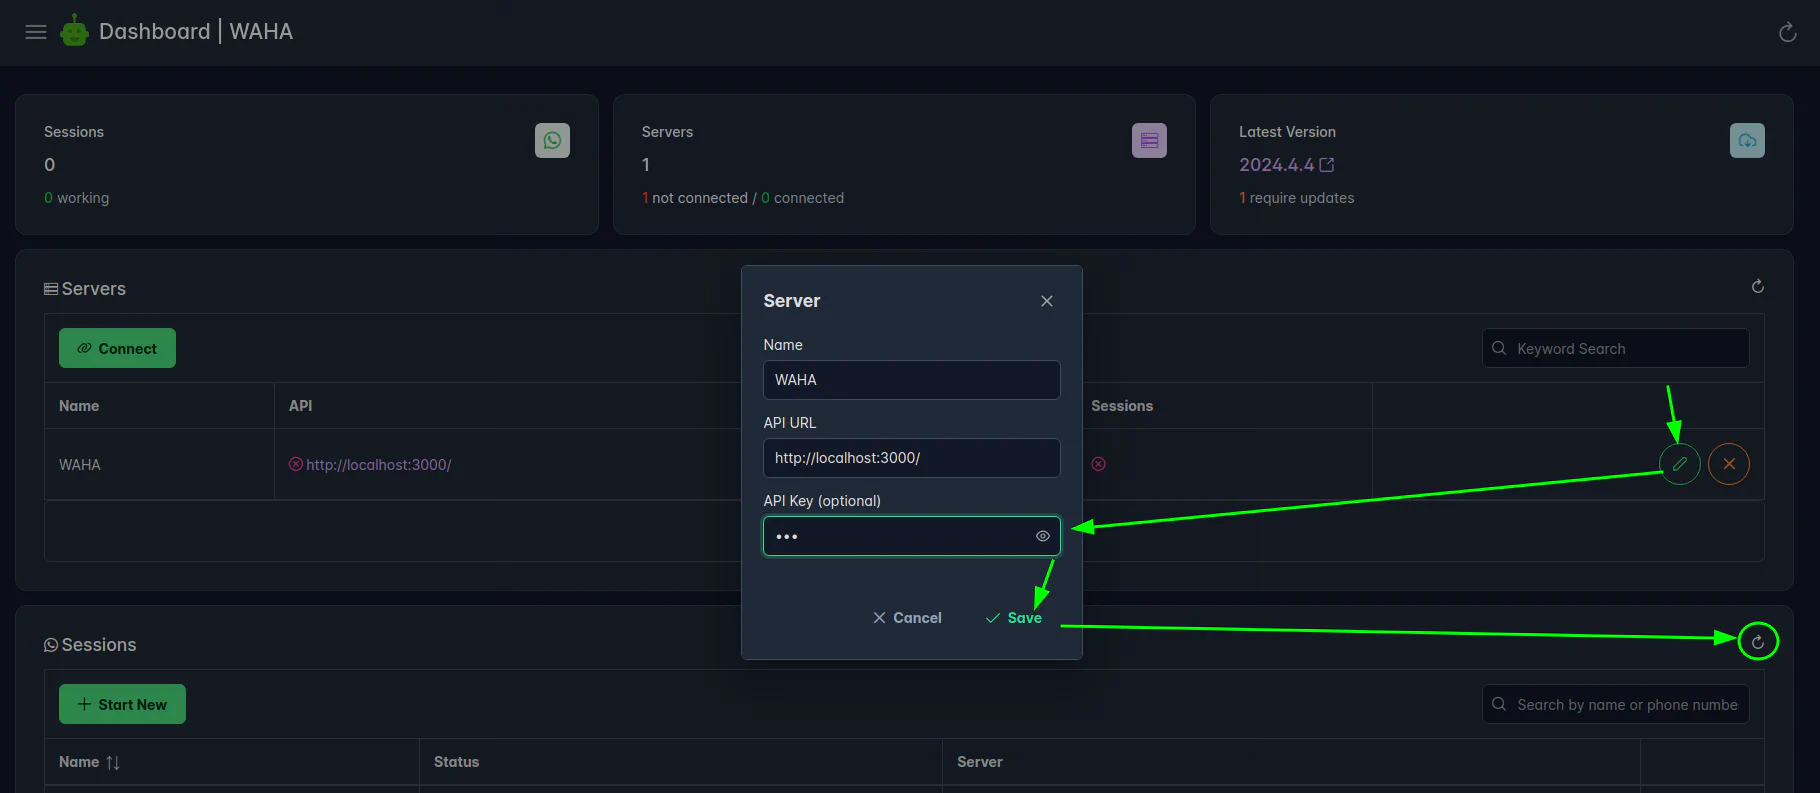
Next, connect to the server using api key from the previous step (.env file - WAHA_API_KEY):
Step 4. Start a new session
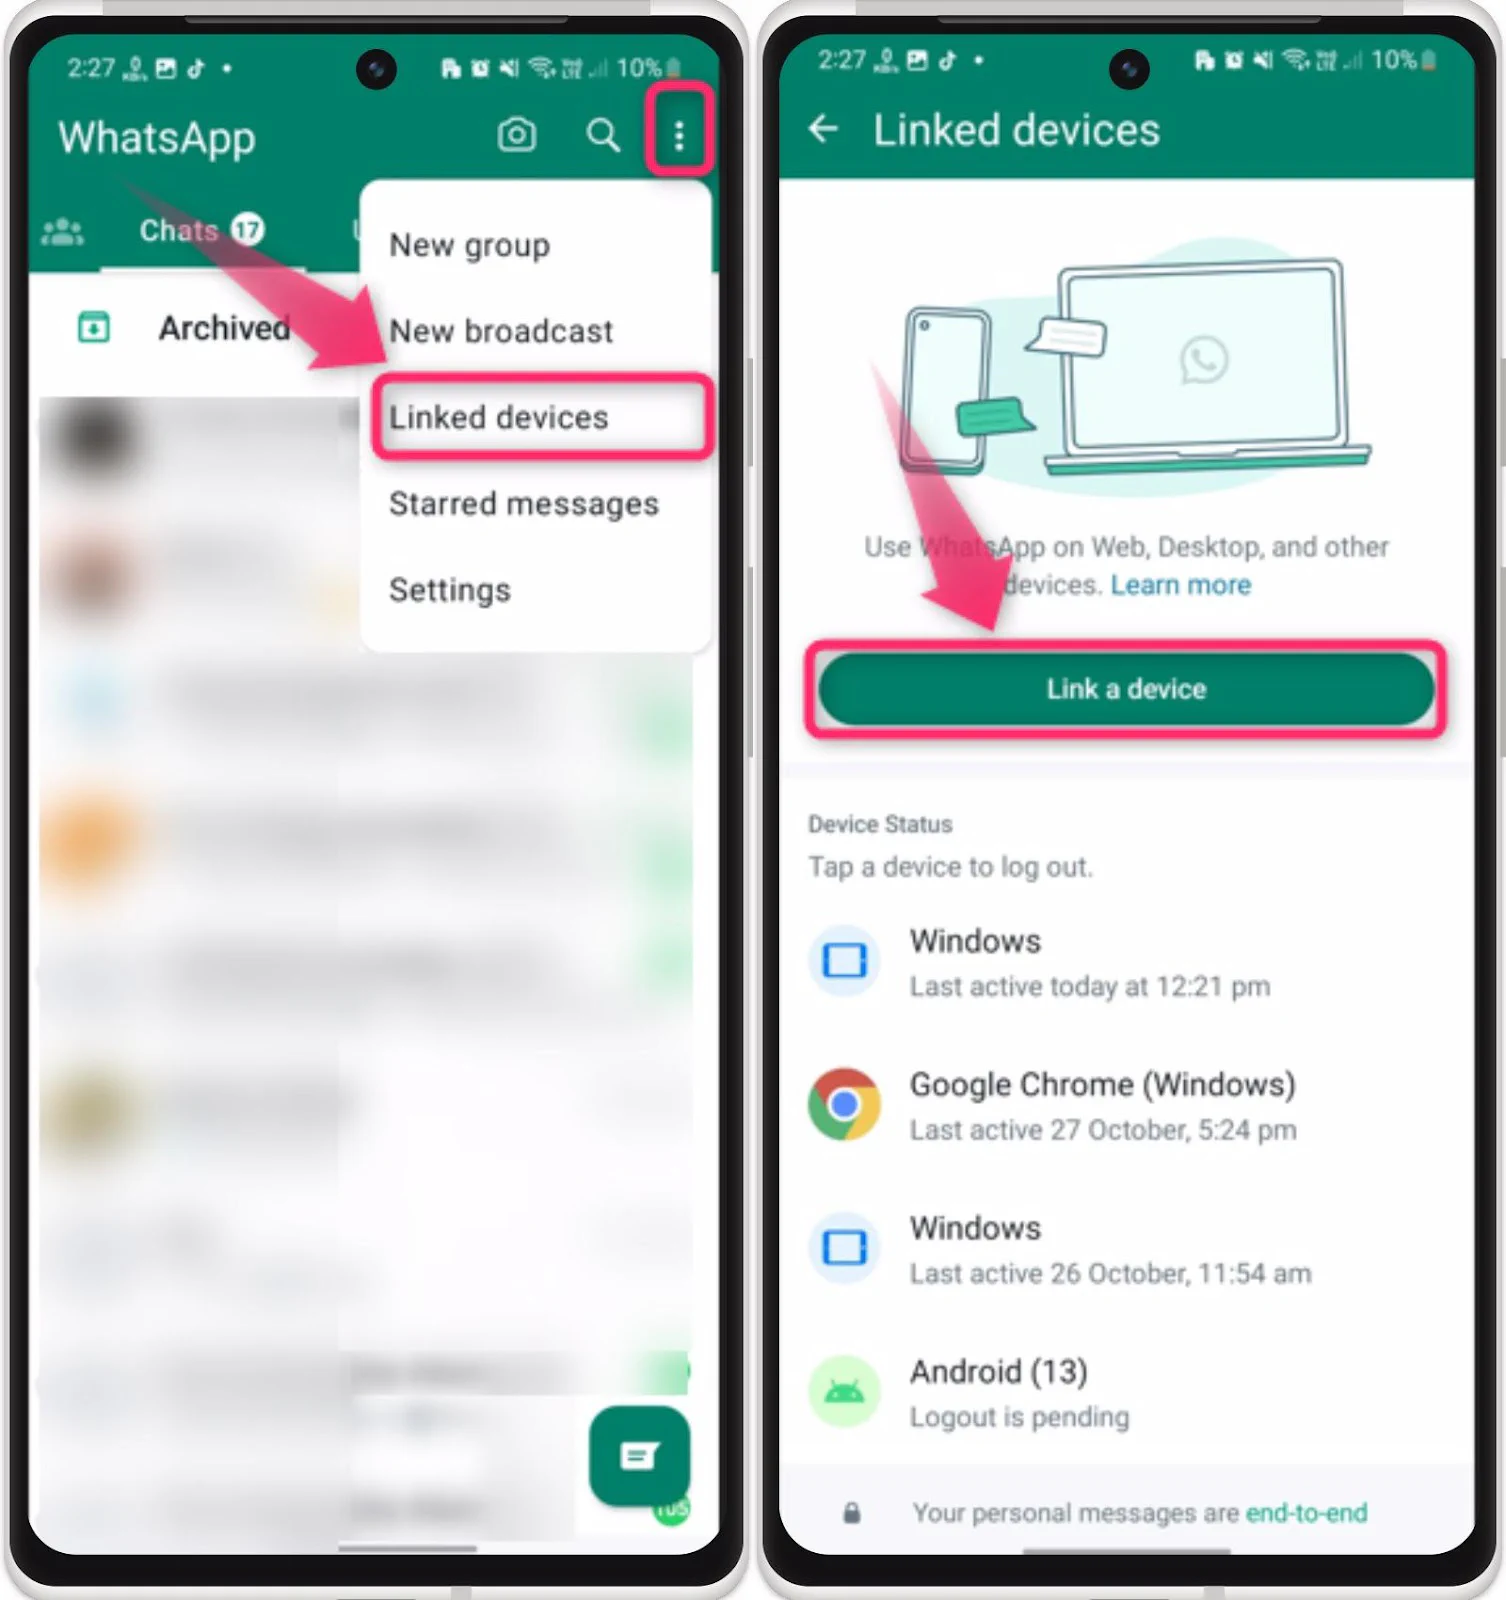
To start a new session, you should have your mobile phone with the WhatsApp application installed close to you.
Here is the official instruction on WhatsApp site on how to log in.
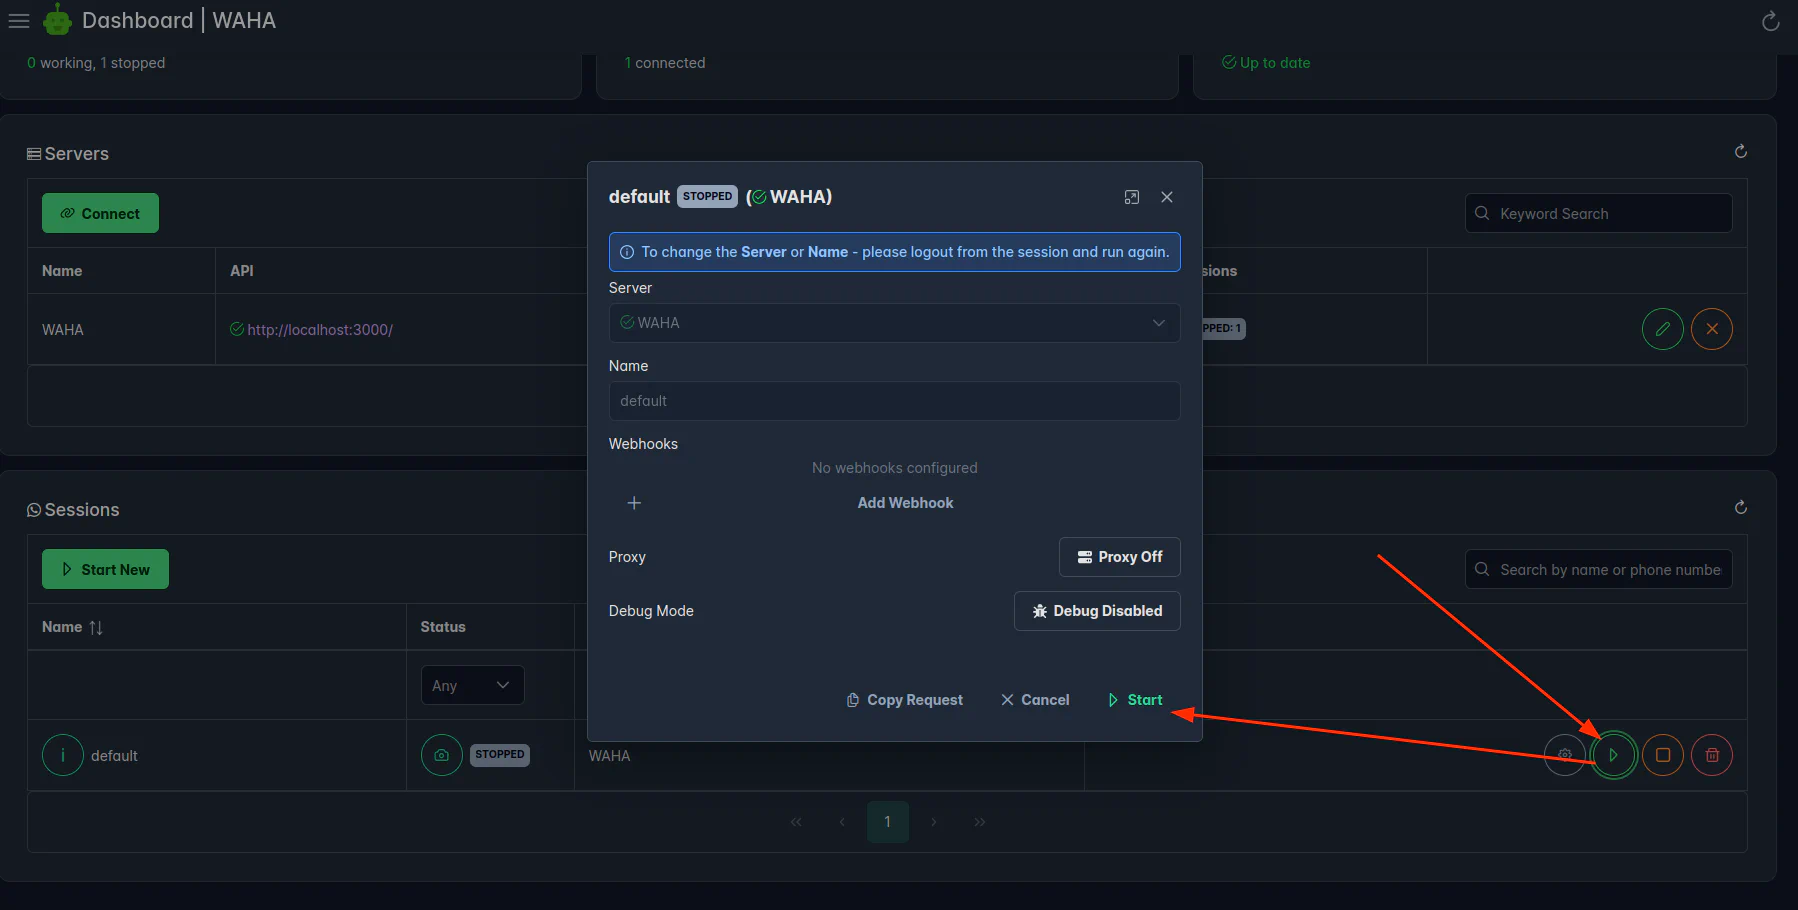
Now you can start the default session (current status should be STOPPED).
You can leave all configuration parameters as default:
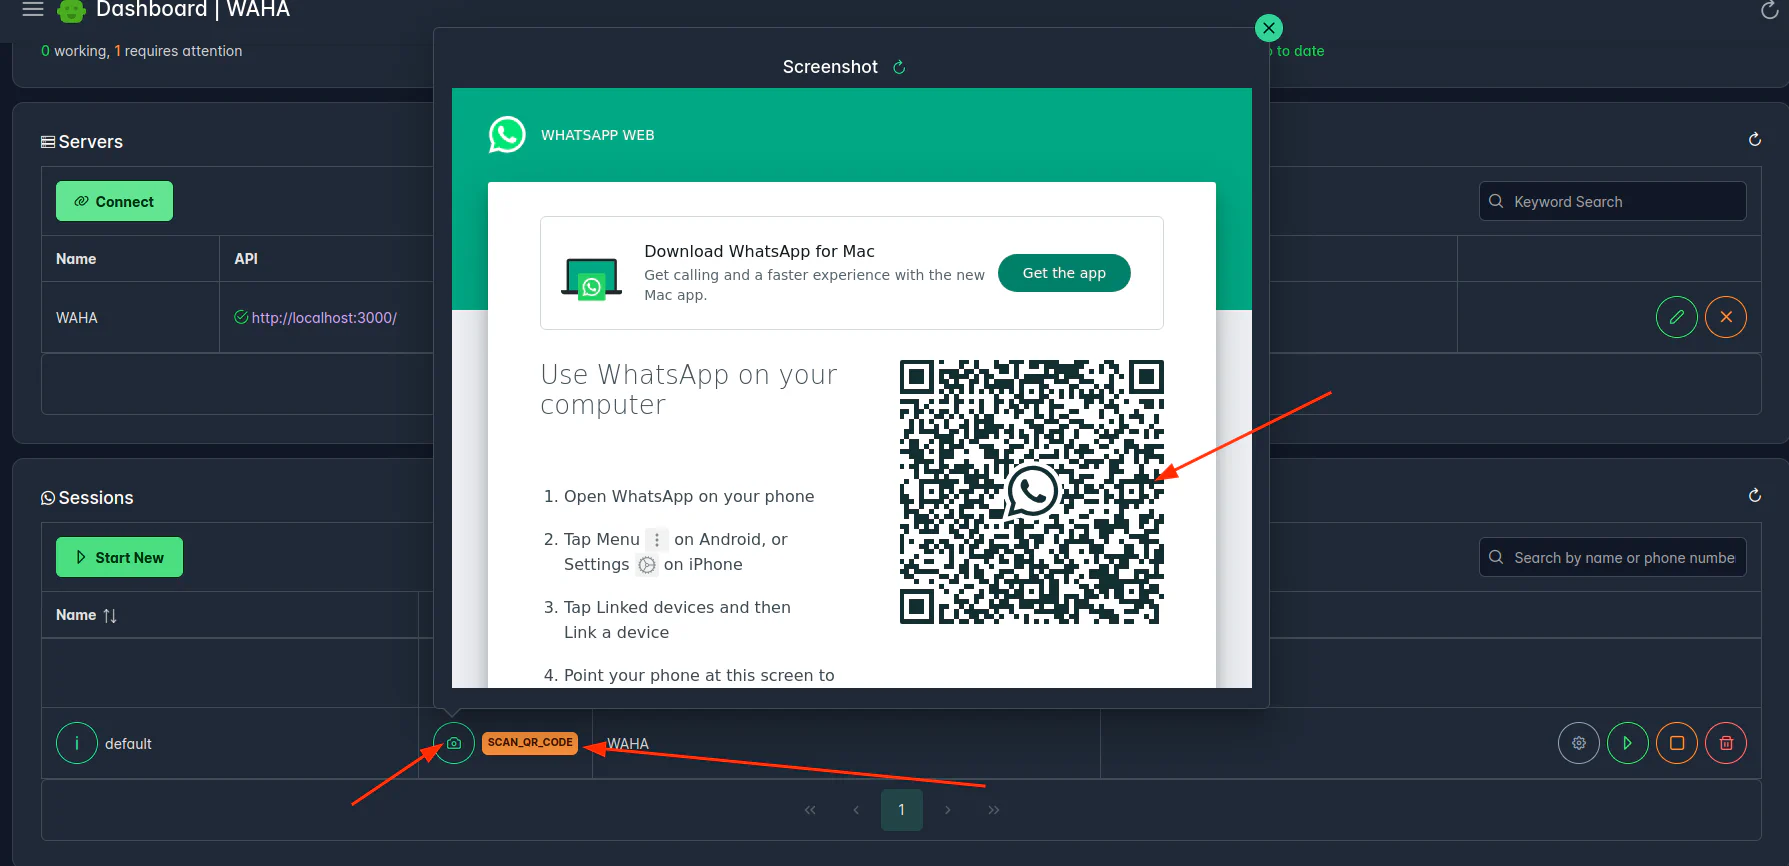
Step 5. Get and scan QR
Wait until the session status is SCAN_QR and click on the “camera” icon:
👉 If instead of the QR you see Click to reload QR - stop the session and start it again.
You’ll see the QR code from the WhatsApp Web app. Now get your phone with the WhatsApp application installed and scan the QR:
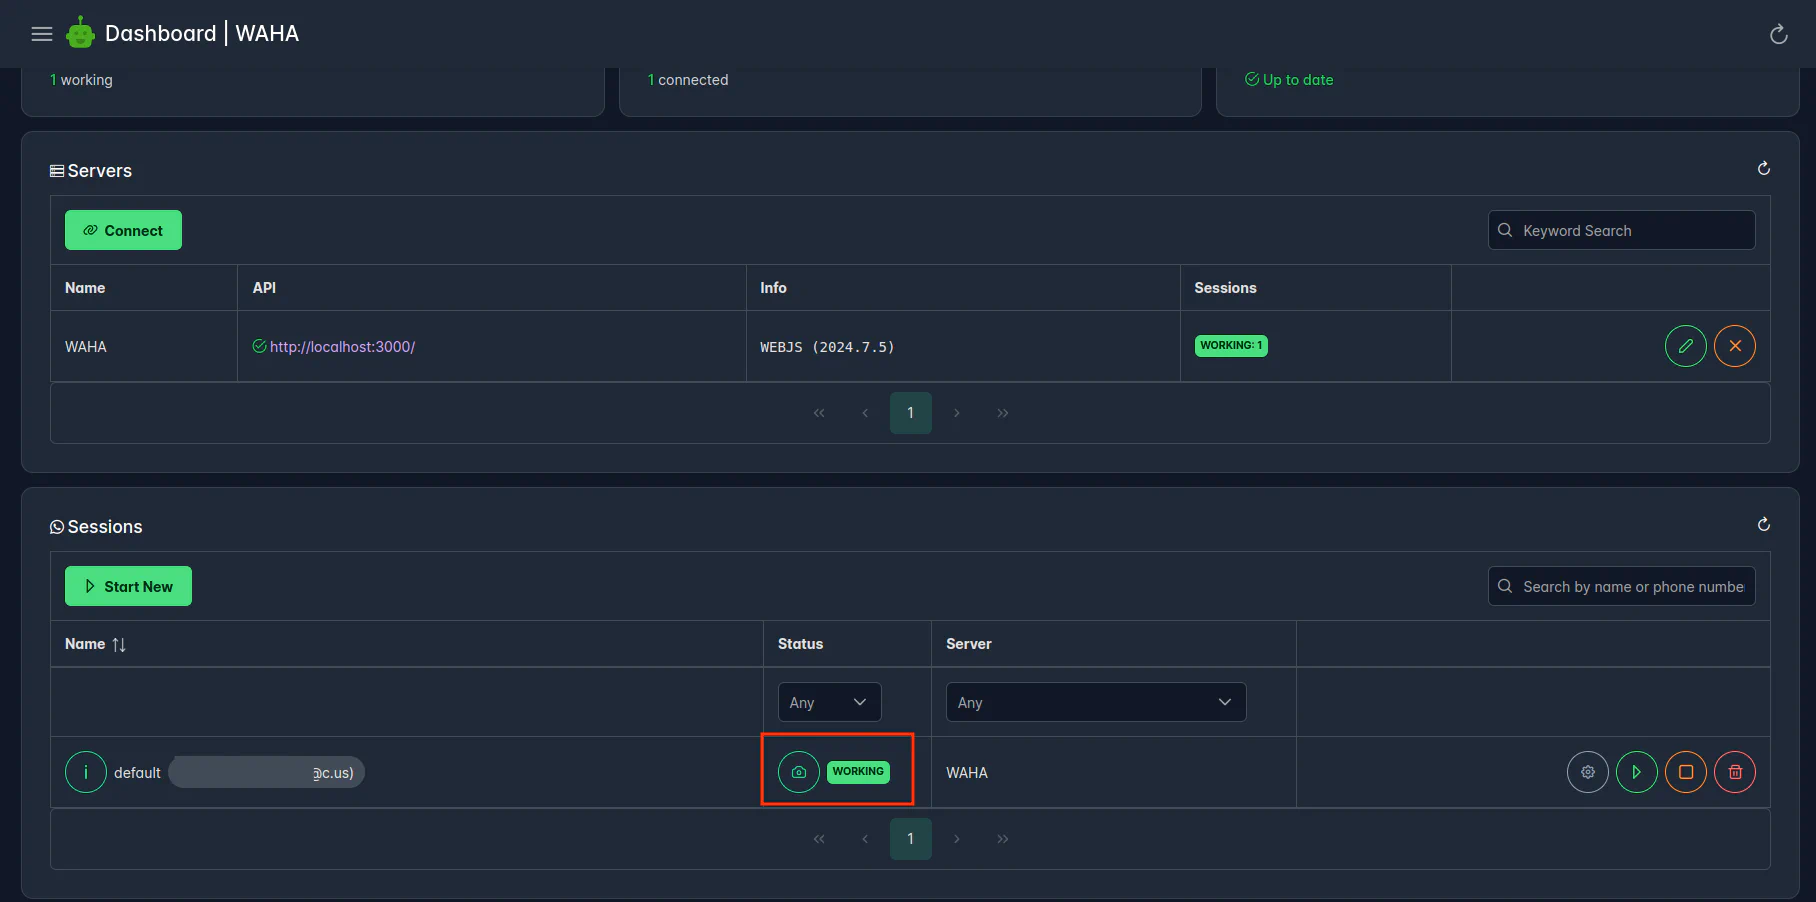
The session status will move to WORKING status:
Step 6. Send a text message
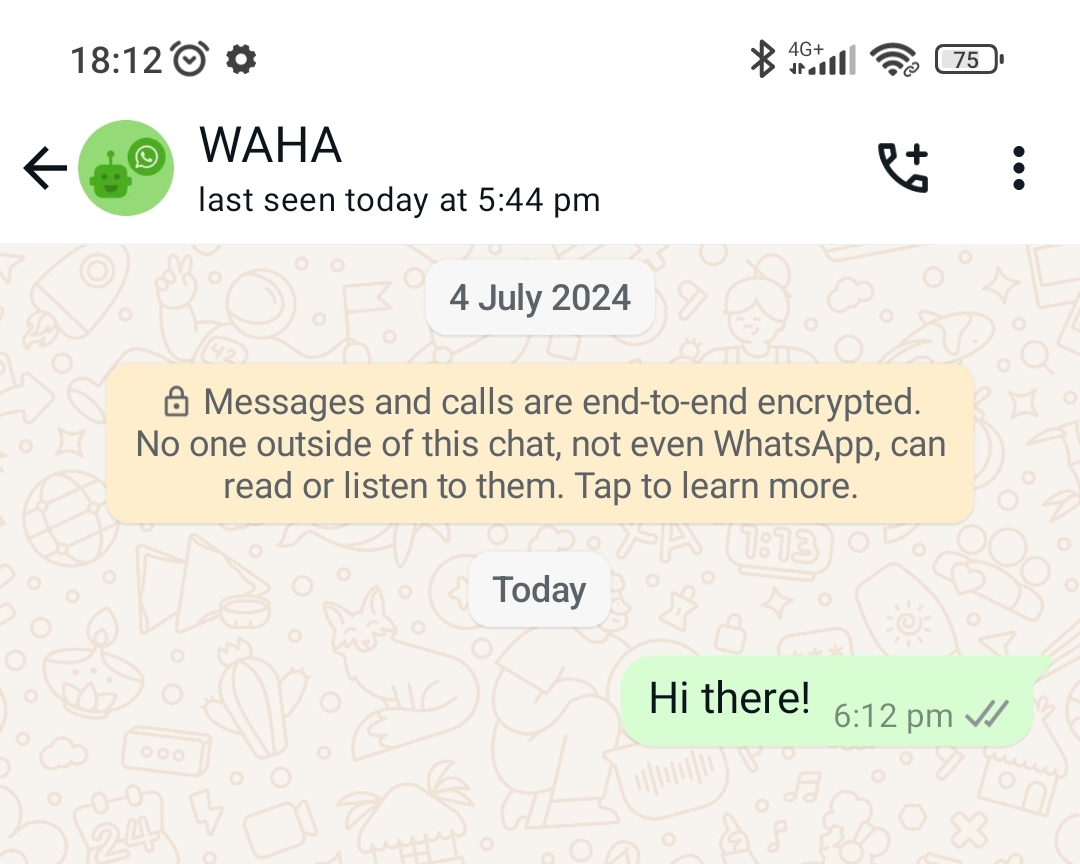
Now we’re ready to send the first messages to WhatsApp via the API!
- Replace
123123with your phone number without +, but keep the@c.uspart. - Use the API key from your
.envfile (WAHA_API_KEY).
The examples below use a placeholder 00000000000000000000000000000000 - swap it with your real value:
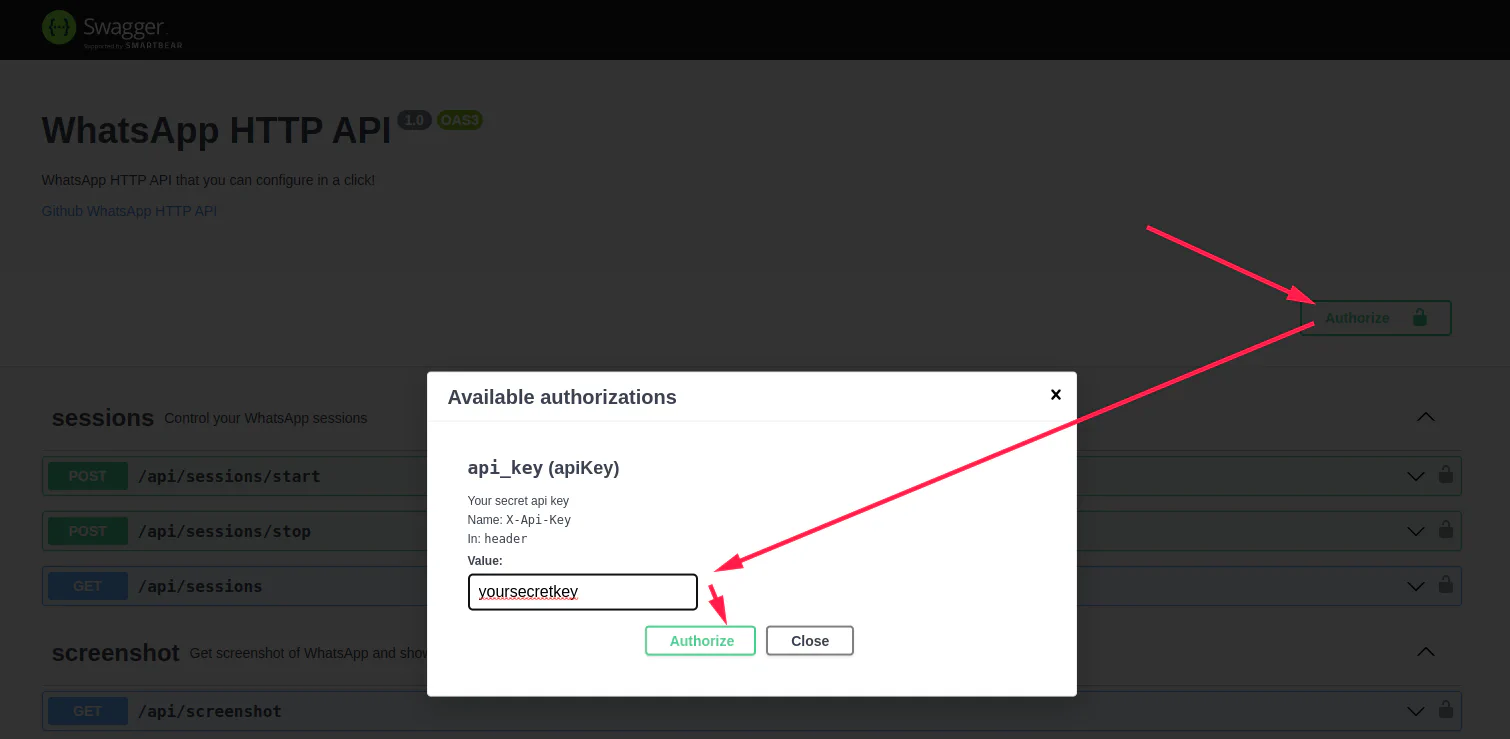
As alternative to curl, you can use 📚 Swagger for that.
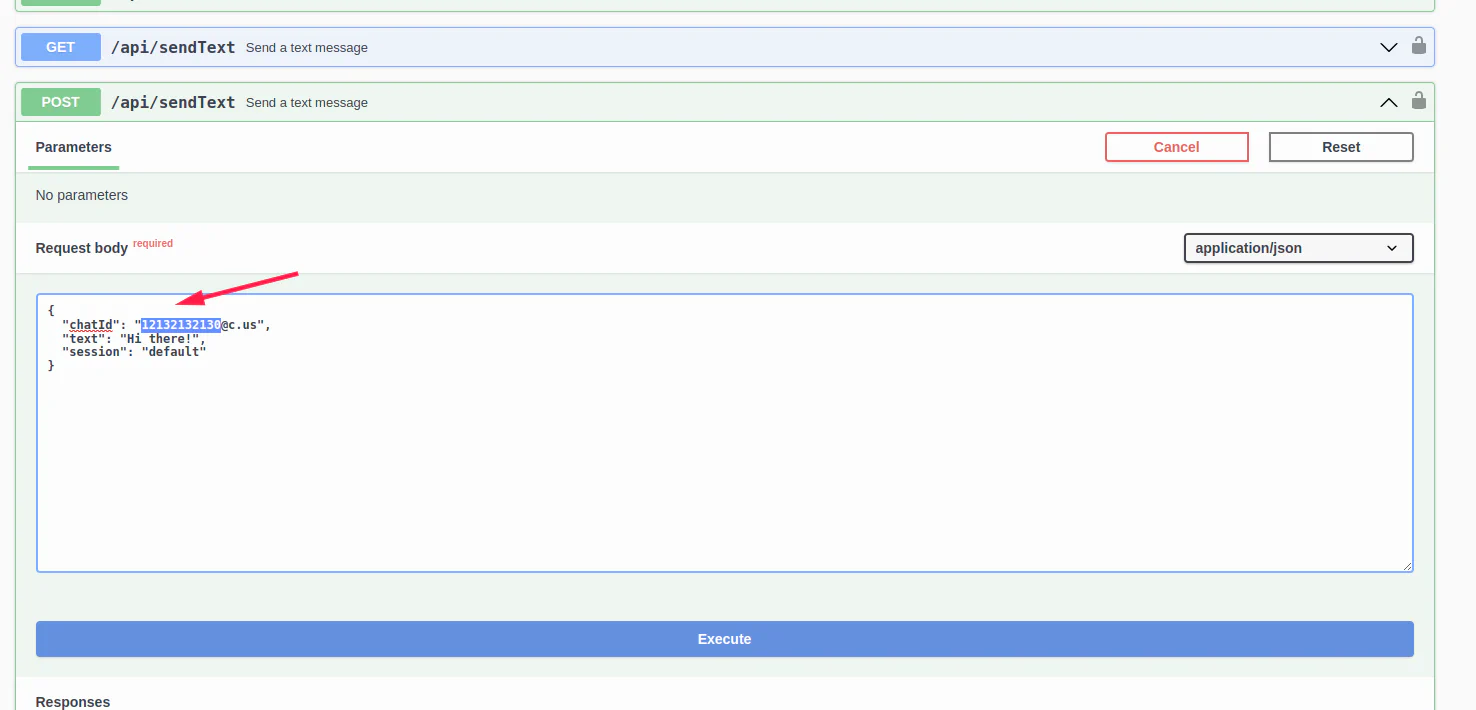
Open Swagger at http://localhost:3000/#/chatting .
Authorize using the Api Key (.env file - WAHA_API_KEY):
- Scroll down to chatting section.
- Find
POST /api/sendTextendpoint and expand it - Click Try it out
- Replace
123123@c.uswith your phone number without +, but keep@c.uspart - Click Execute
What’s next?
Looking for Hosting?
We’ve been using the.hosting for quite a while and had a great experience.
They offer a wide range of server configurations and locations - highly recommended! 👍
Build Fast
Ask 🤖 WAHA GPT to help you build {python|js|php} code!